IBM WebSphere
Please refer to the Proposed Directory Structure for assistance with the steps below.
Basic Configuration
-
Open the
launcher.cfgfile which is located in the top-level directory of the Java Launcher Pack. -
Search for the following lines:
#CONTAINER_HOME=<absolute-path>#JVM_HOME=<absolute-path>#WARATEK_HOME=<absolute-path>Relative paths are supported in the JLP configuration file. The paths are resolved relative to the location of the
launcher.cfgfile that they are defined in. -
Delete the
#symbol at the beginning of each line to enable settings. -
Set
CONTAINER_HOMEto the location of JDK which your existing Application is using (e.g. Oracle Hotspot version 6u23). -
Set
JVM_HOMEto the location of host JDK which is typically the latest version at the time of the Waratek installation (e.g. Oracle Hotspot version 8u191). -
Set
WARATEK_HOMEto the location of the Waratek agent:- On Linux:
WARATEK_HOME=/opt/waratek/agent
- On Windows:
WARATEK_HOME=<path-to-waratek-software>\agent
- On Linux:
Startup Settings
- Log in to the administrative console for the WebSphere node where you want to install the Java Launcher Pack.
- Go to Environment > WebSphere variables > JAVA_HOME.
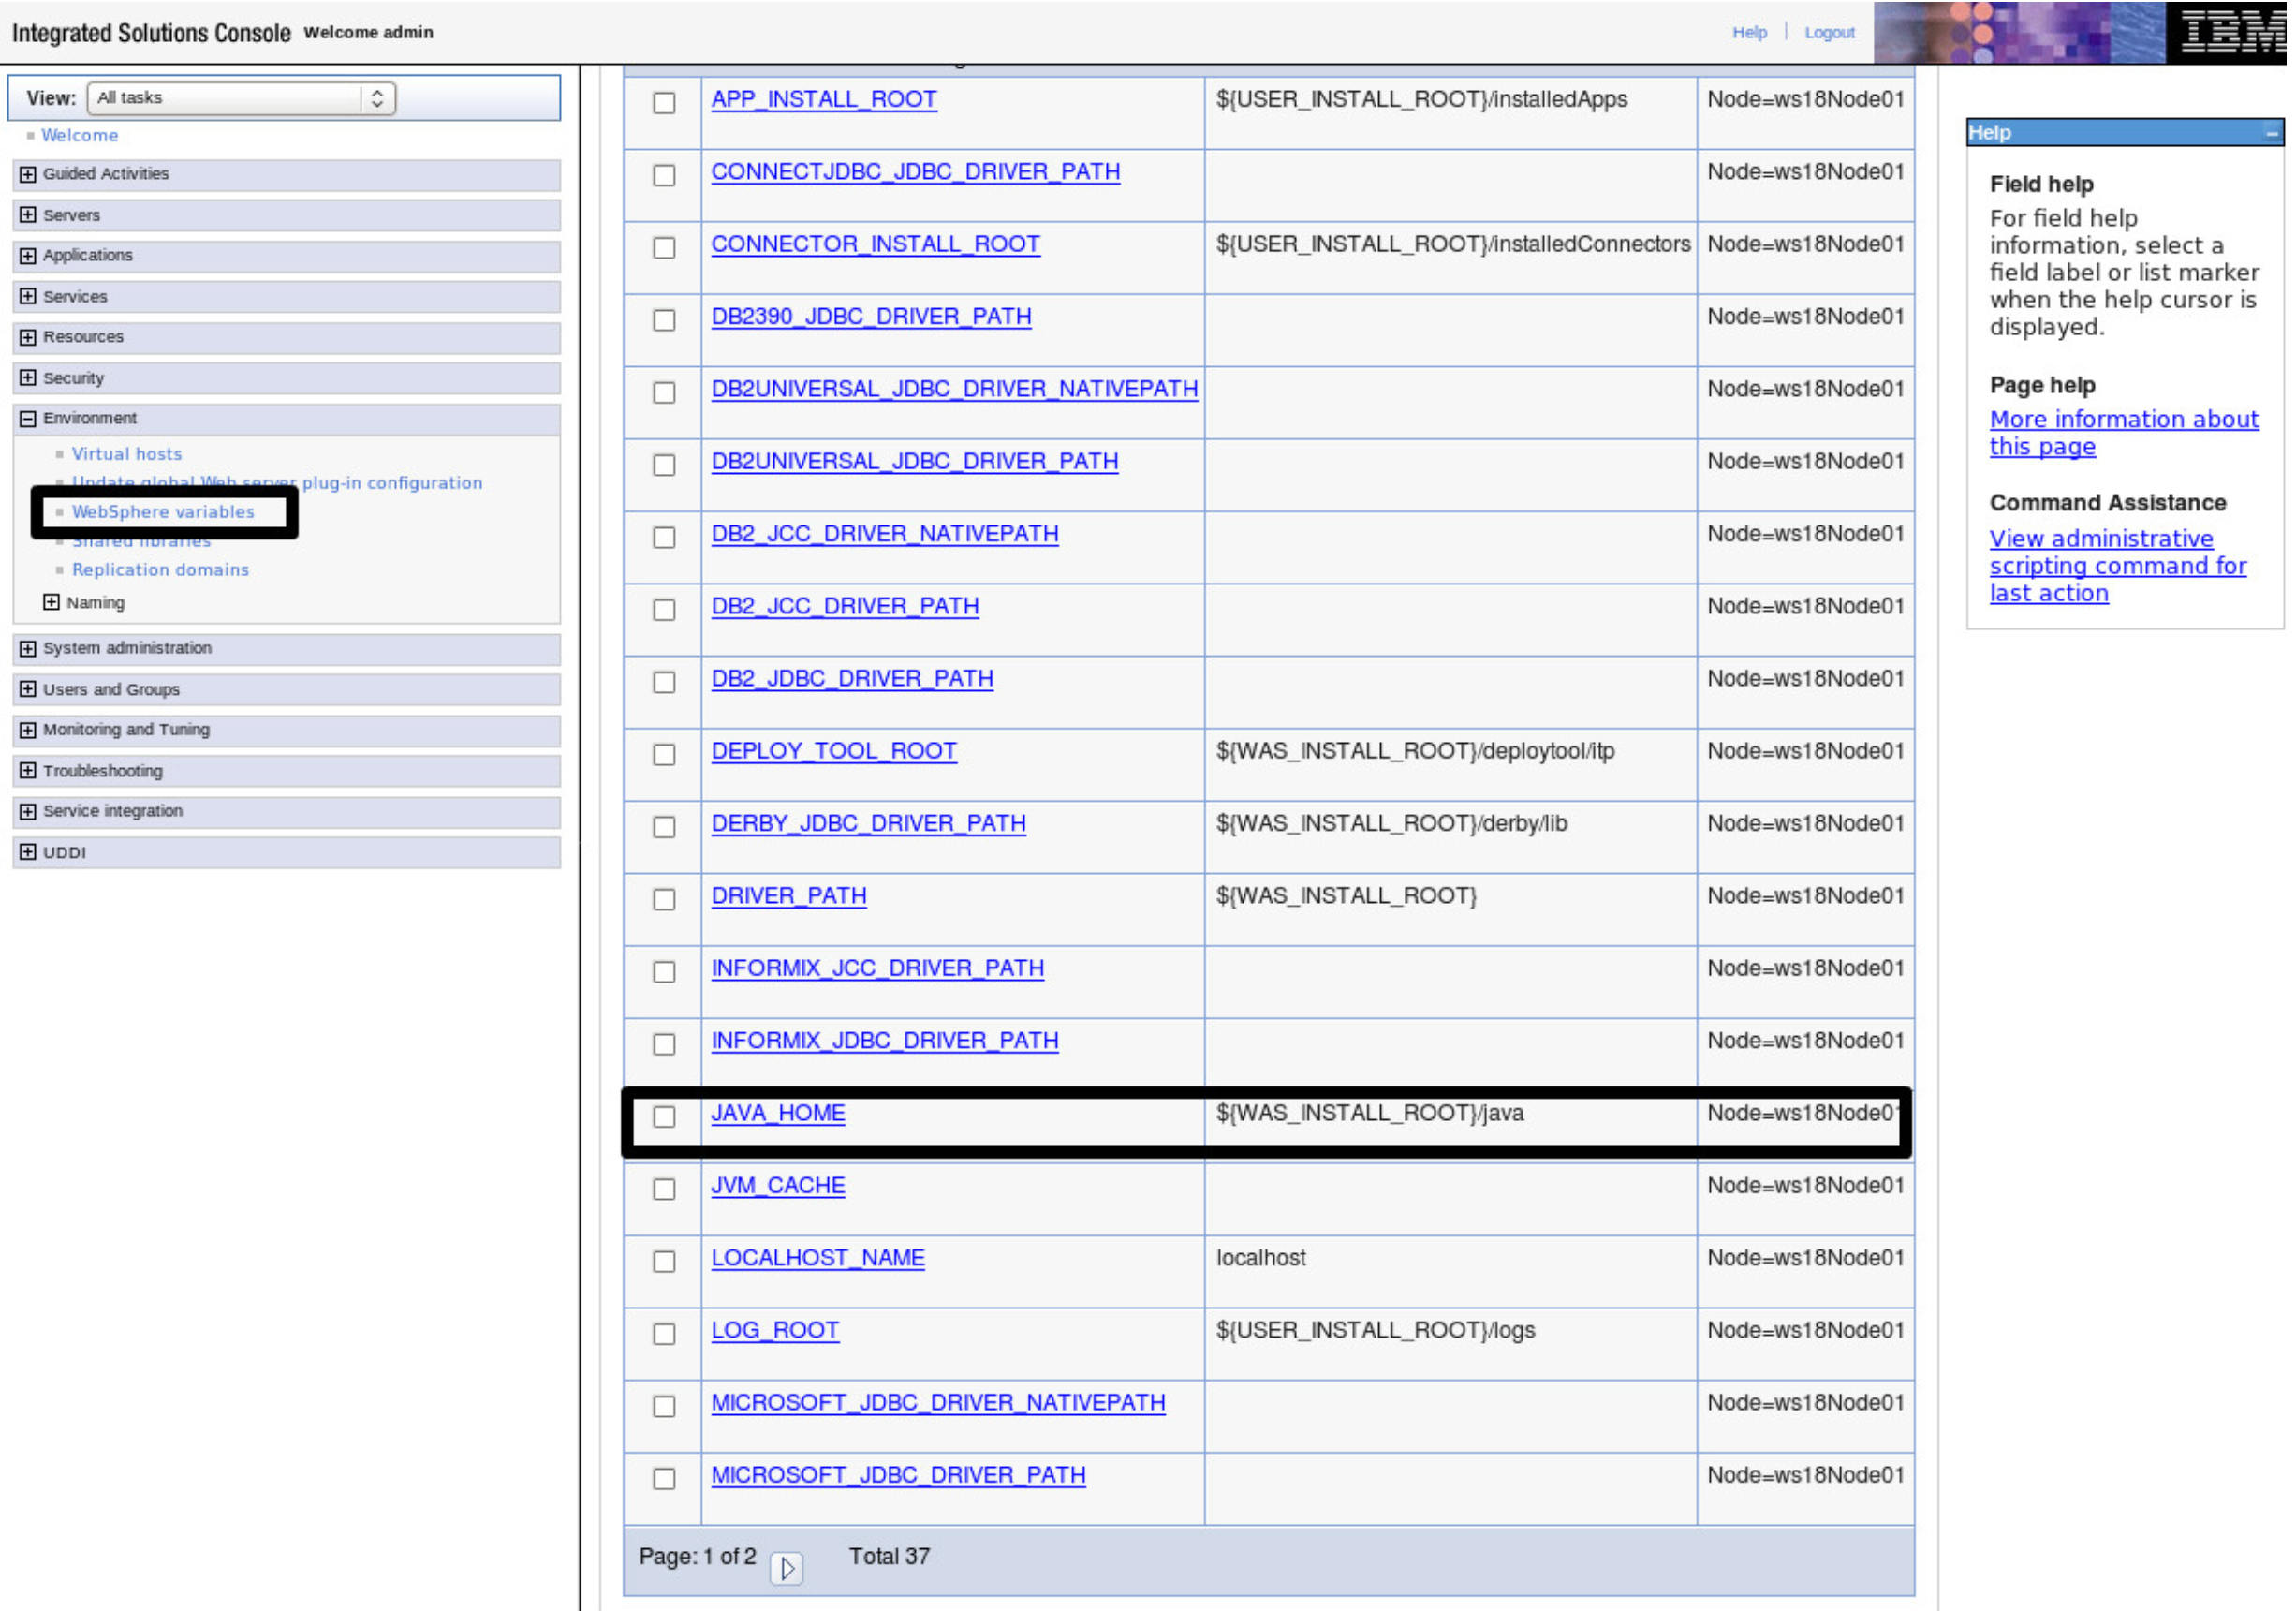
- Note the location used for
JAVA_HOME(e.g.${WAS_INSTALL_ROOT}/java). - Make a backup copy of the
javadirectory used forJAVA_HOME:mv java java_backup - In the same directory, make a symbolic link
javato the Java Launcher Pack directory. For example:ln -s /opt/waratek/launcher ./java - Check the symbolic link is created:
ls -l ./java
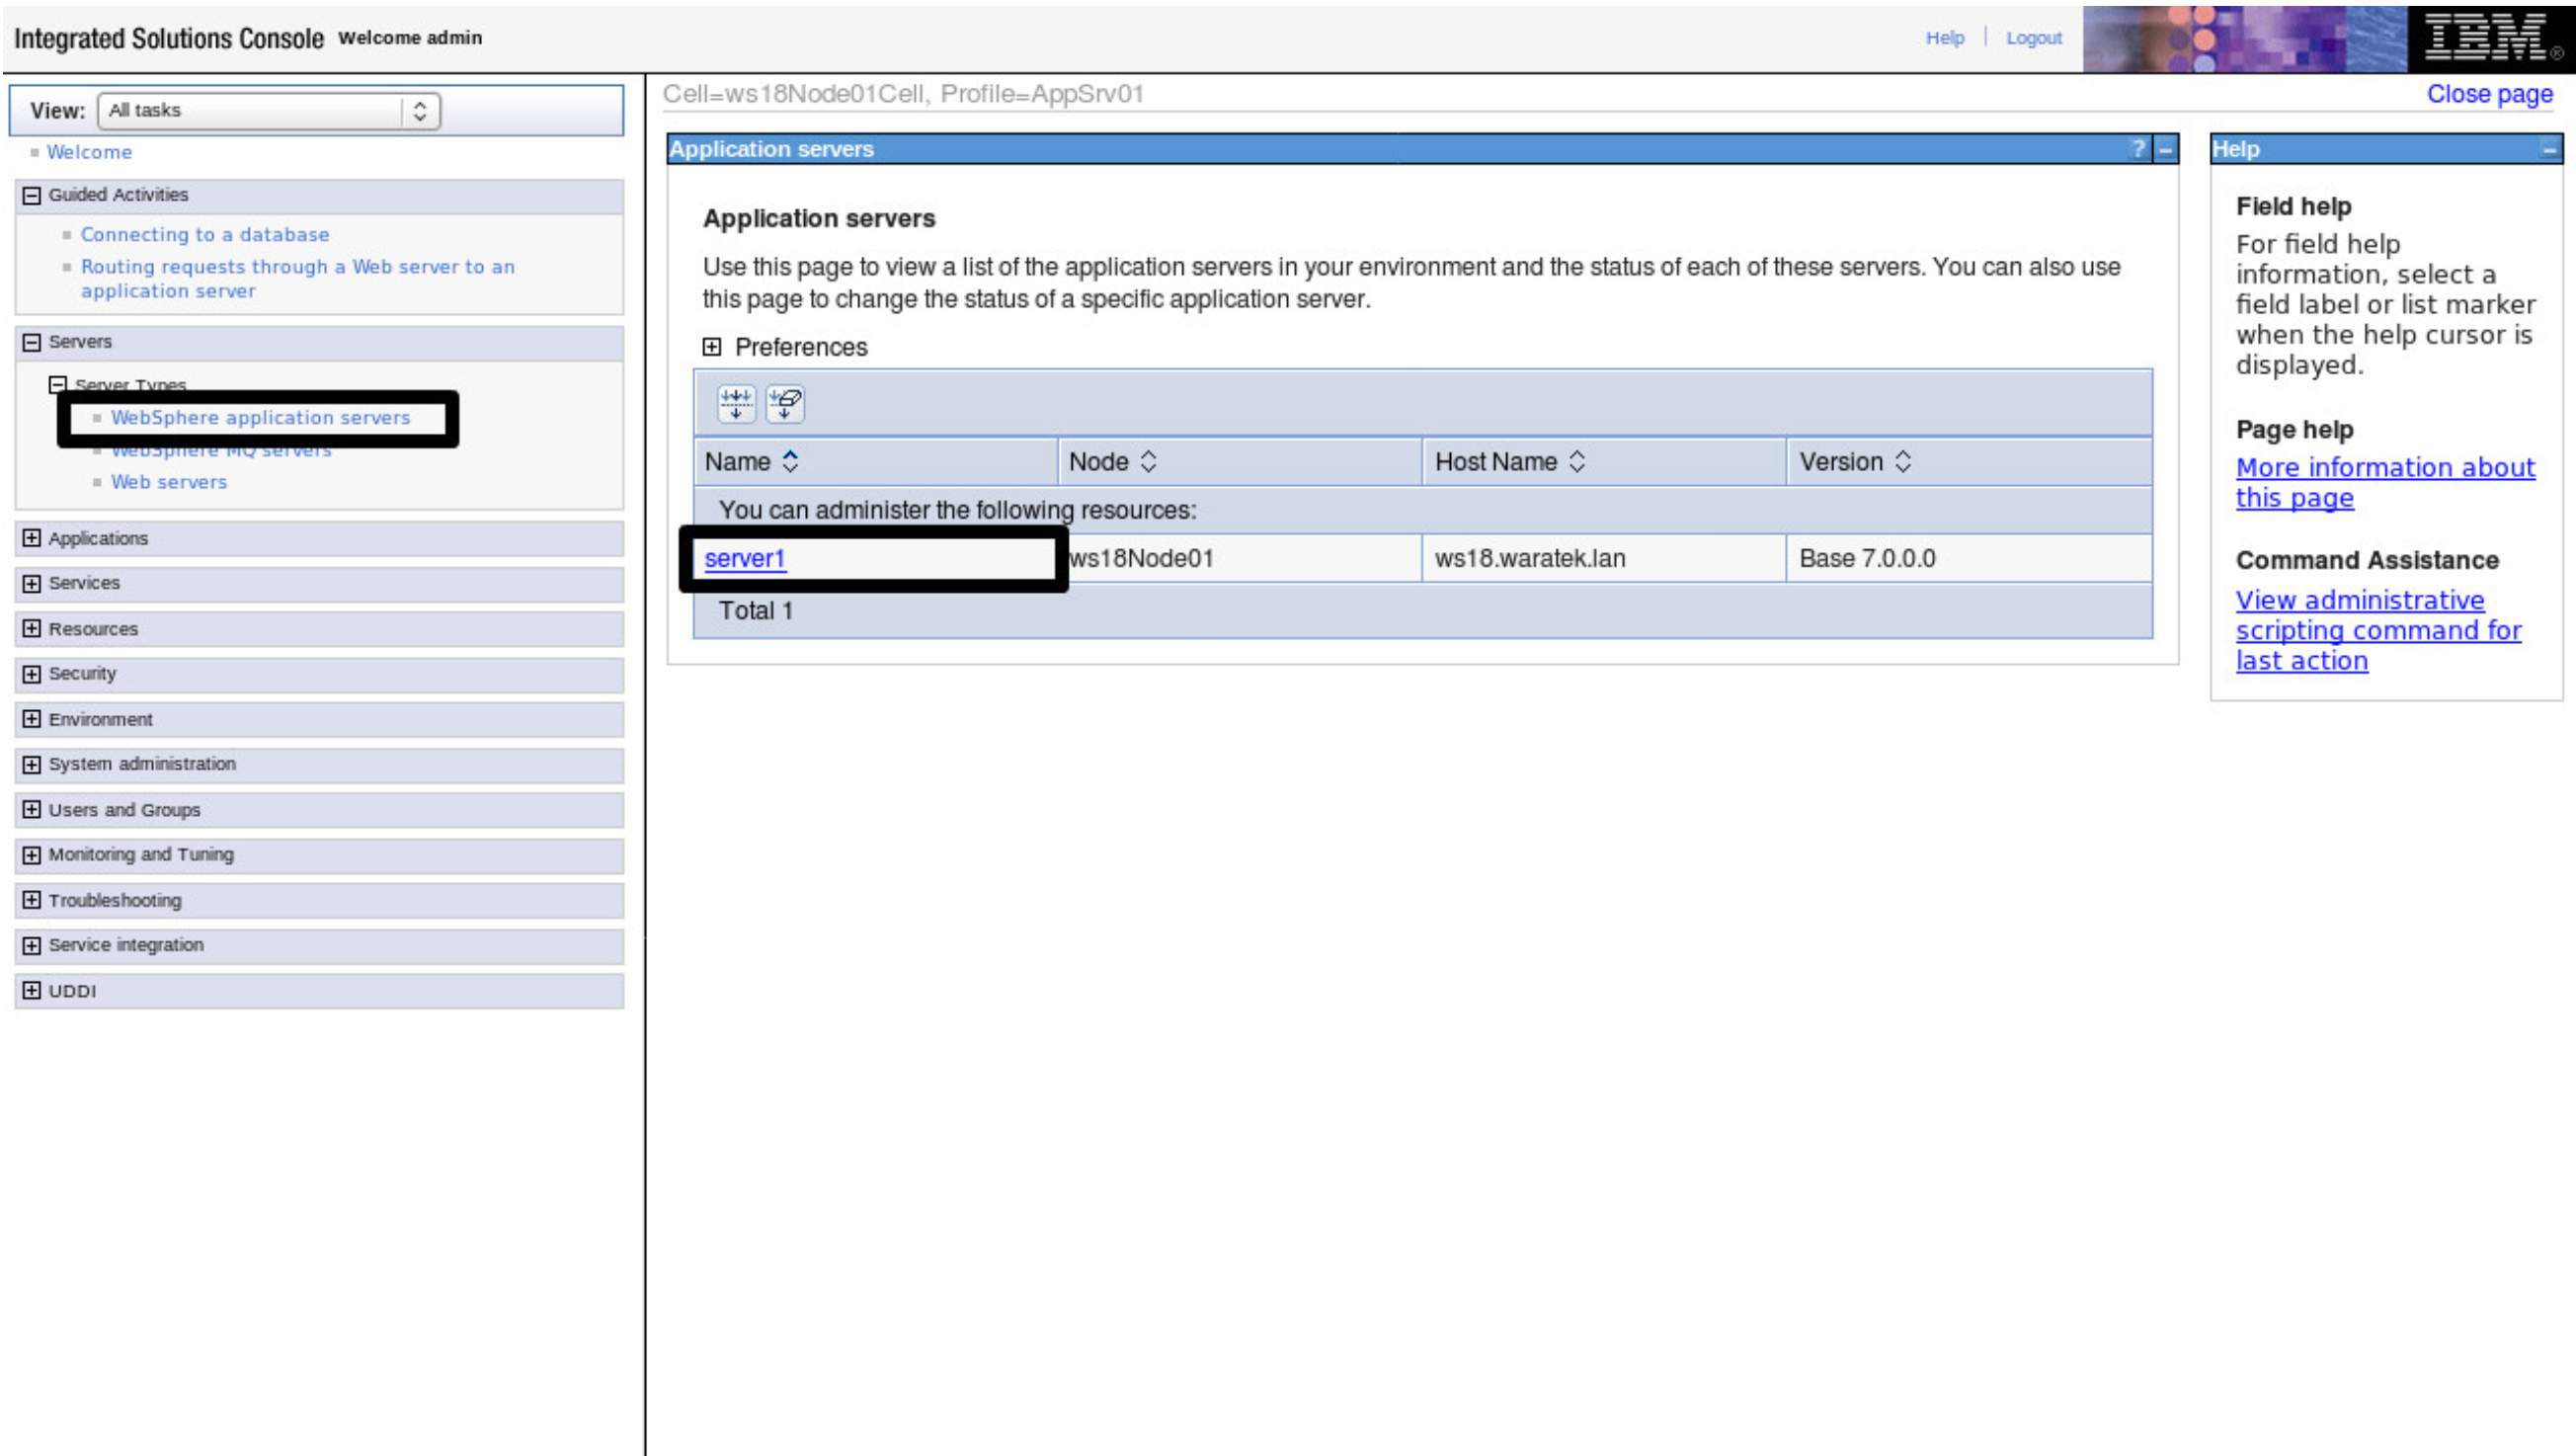
- Specify
-Dcom.waratek.WaratekPropertiesas follows:- In the administrative console, click WebSphere application servers > server_name.
- Click Java and Process Management > Process definition.
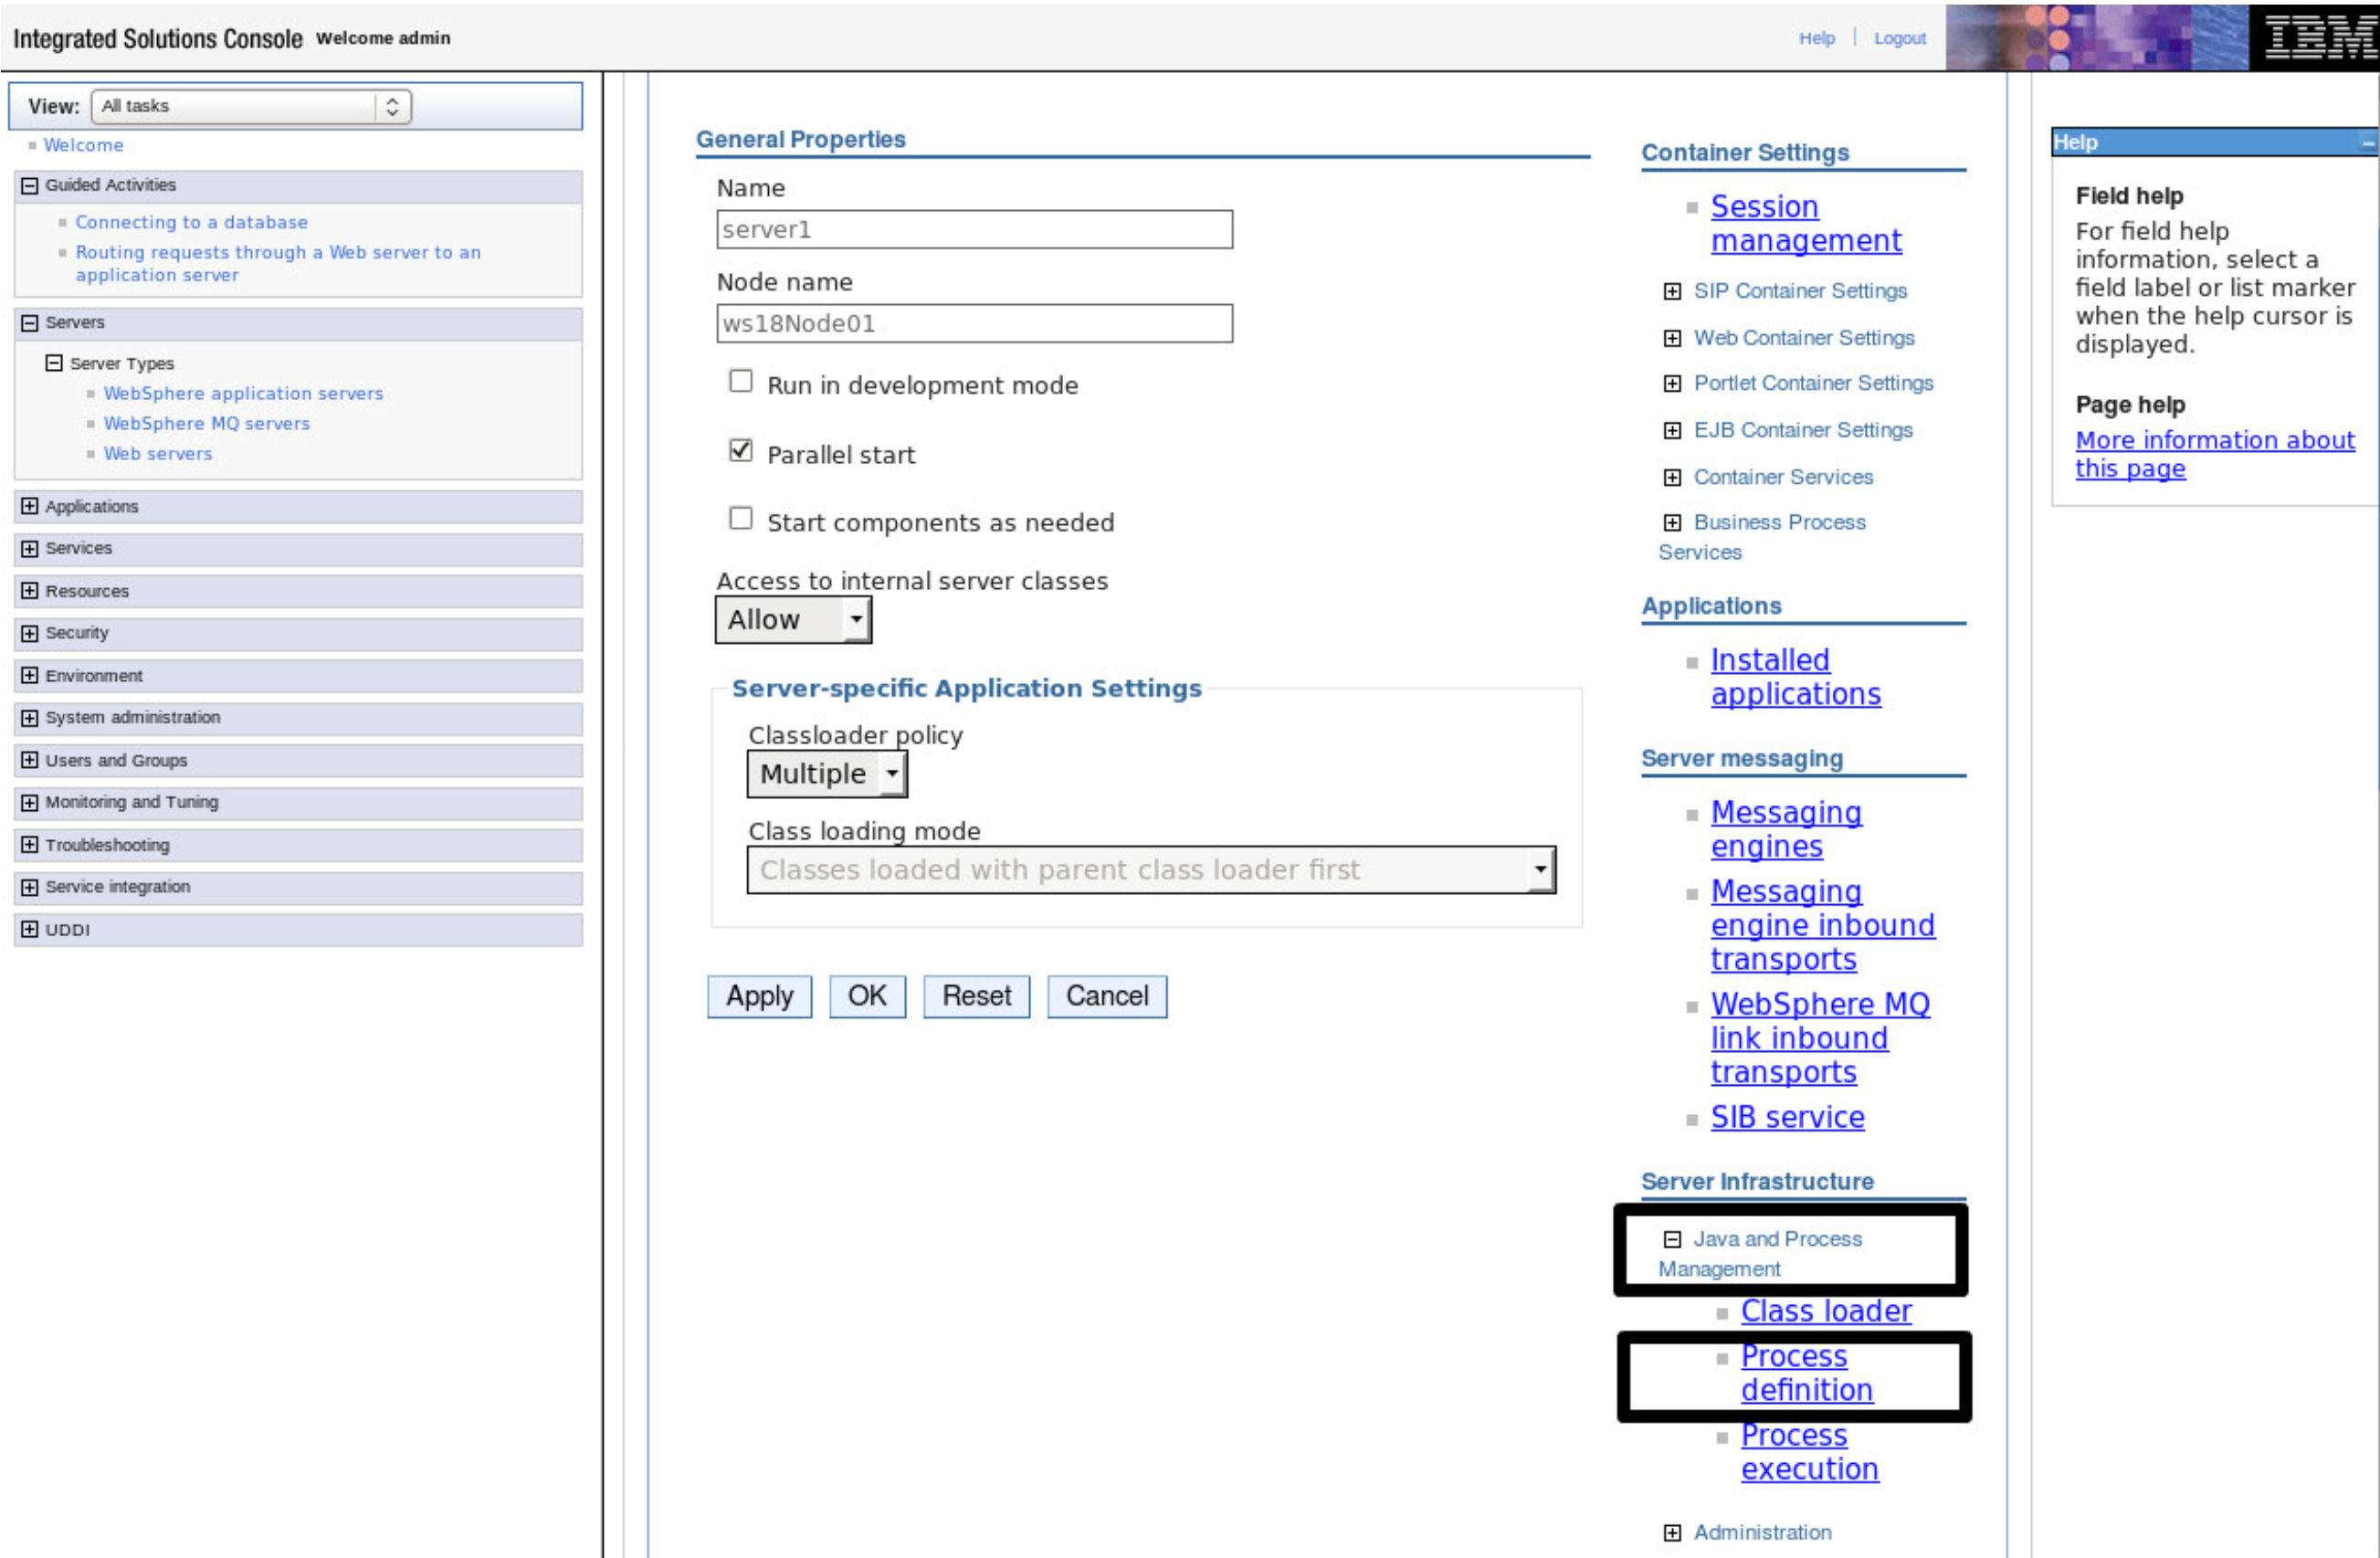
- Click Java Virtual Machine.
- In the Generic JVM Arguments field, add the JVM options as follows:
- On Linux:
-Dcom.waratek.WaratekProperties=/opt/waratek/<conf_*>/<name of property file>
- On Windows:
-Dcom.waratek.WaratekProperties=<absolute-path-to-waratek-software>\<conf_*>\<name of property file>
- On Linux:
- In the administrative console, click WebSphere application servers > server_name.
- Click Apply.
- Save the changes.

- Restart the WebSphere server. The server must be restarted for the changes to take effect.
Troubleshooting
Verify the configuration settings by checking the variable.xml file of the WebSphere node where you installed the Java Agent. The file should have the correct entries.
- Go to
<WebSphereLocation>/profiles/<profileName>/config/cells/machineNameNode01Cell/nodes/machineNameNode01Cell - Open
variable.xmlin the same directory. - Check the value of
JAVA_HOME. For example:<entries xmi:id="VariableSubstitutionEntry_1528377842438" symbolicName="JAVA_HOME" value="/home/users/IBM/WebSphere/AppServer/java" description="The filesystem path to the Java Virtual Machine installation directory."/>