Portal Quick Start Guide
This page is intended to show beginners how to add and protect an application within the Portal.
Sign in to the Portal
To sign-in to the Portal, follow these steps:
1) Receive an Organization ID from Waratek, and the credentials of an administrator user.
Once you have purchased a Waratek licence, Waratek will send you an Organization ID, along with the username and password of an administrator user.
2) Go the the Portal website
Go to https://portal.waratek.com/
You will be redirected to the ‘org-id' page:

3) Enter your organization id and click the Next button
You will be redirected to the ‘Sign-In' page:
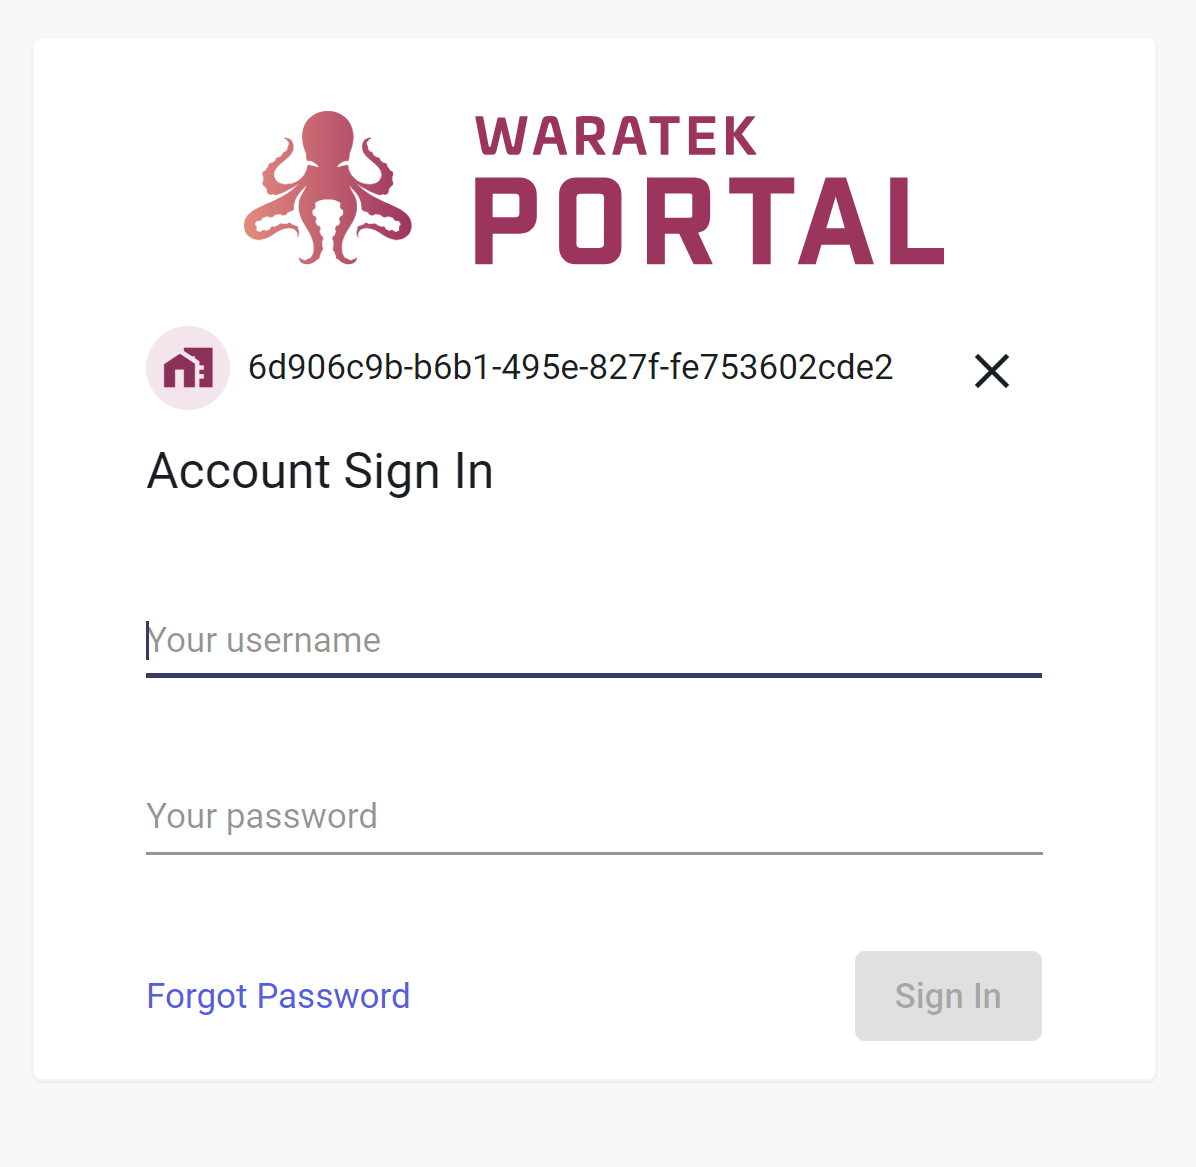
4) Enter the credentials of the administrator user, then click ‘Sign In'
Enter the username and password of the administrator user, which were sent to you by Waratek.
Then click ‘Sign In'
5) Once you are Signed-In, configure the site as you wish, e.g.
- You can change your username and password on the My Details page, which you can navigate to by clicking your username on the bottom left of the Portal:

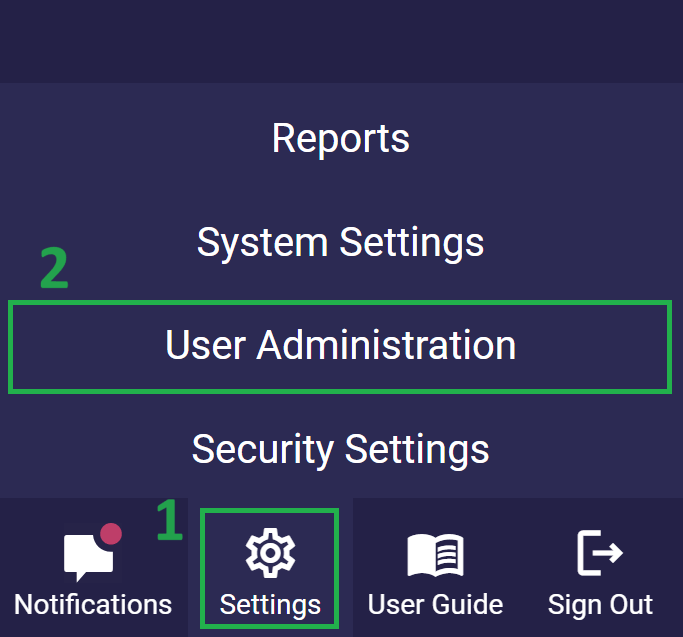
- You can add add new users on the User Administration page, which you can navigate to by clicking Settings > User Administration at the bottom left of the Portal:
Create and attach ARMR Rules to secure your Application
There are several routes to getting set up within the Portal interface but the following is the recommended path for best results:
1) Add your Application to the Portal.
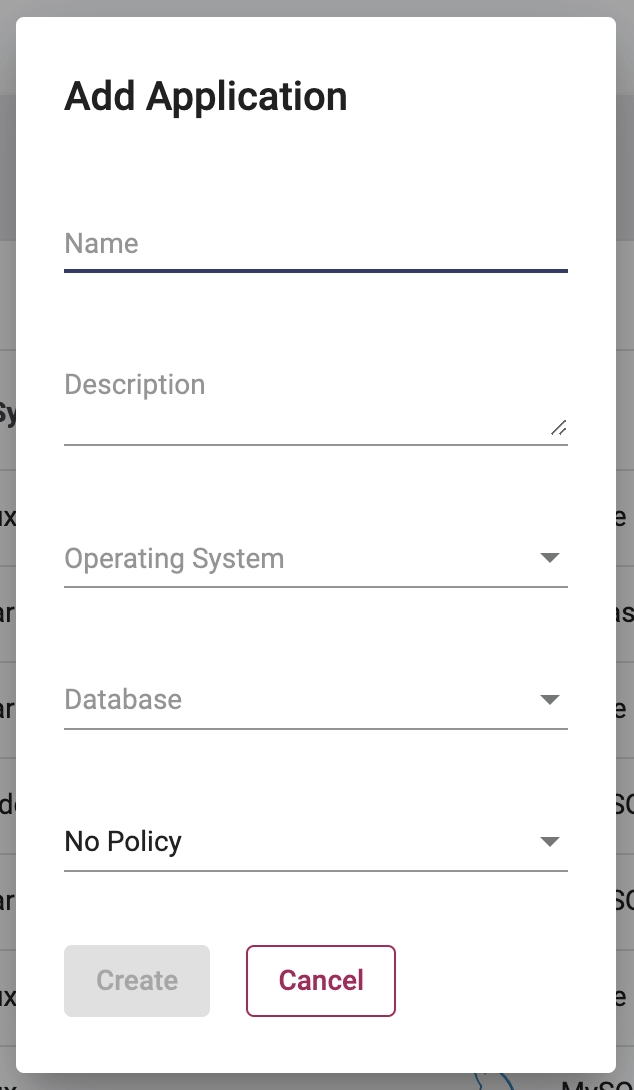
You can do this by clicking on Applications  in the side navigation and once on the Application page, select the New Application button in the top right of the page. Complete the short form that pops up on the screen. The last field can remain as ‘No Policy' for now as you have not yet created any policy to attach.
2) Create a Policy to hold the security rules for your application
To do this, click on Policies  in the side navigation and once the Policies page has opened, select the New Policy button at the top of the page. A pop-up form will appear requiring a name and description (optional) for the policy. These details can be amended later; something generic like ‘Policy 001' will suffice for now. Select the Create button and the policy will appear listed on the screen.
3) Create a Rule within the policy to secure your application
Click on the policy name under the Name column to jump into your new policy's management interface:

Here you will find three tabs:
- Mods - these are containers for your rules. All rules must exist within a mod. If you create a rule the Portal will automatically assign it to a mod of the same name.
- Rules - these secure your application. There are many rule types that you can create depending upon your security needs
- Applications - this is where you will see the names of your applications that have this particular policy attached.
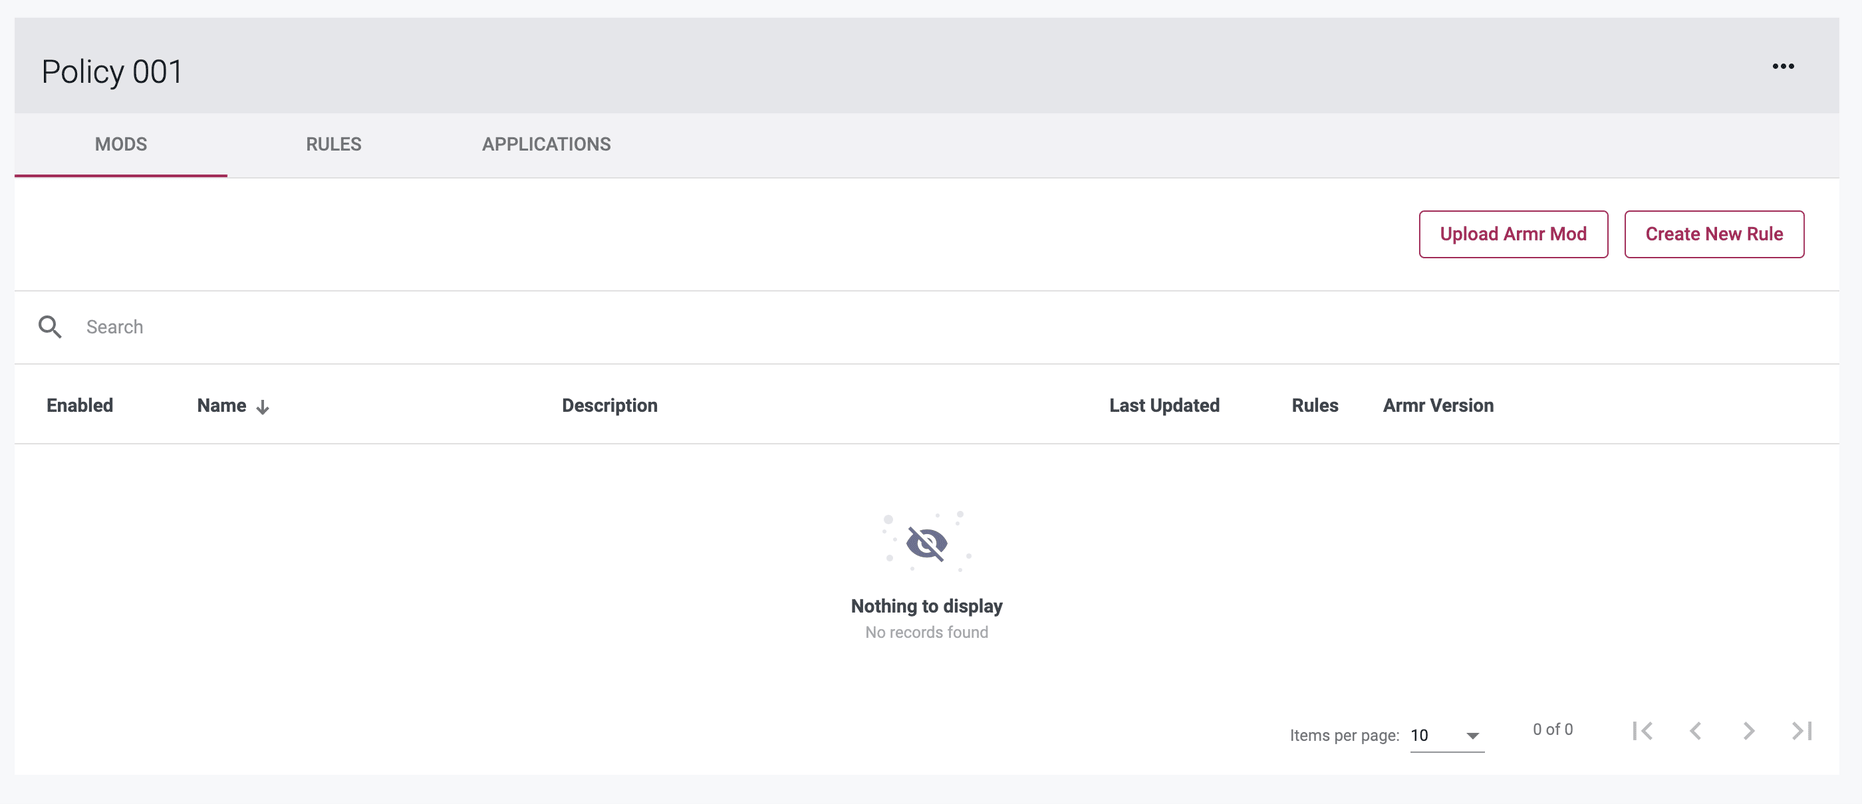
Under either the Mods or Rules tabs you will find a Create New Rule button - click on this button to open the Rules Wizard. The initial pop-up will ask you to select an ARMR version and a rule type.
The ARMR version will depend on what your Waratek Agent supports. Not all agents are compatible with all ARMR versions. Mods can easily be upgraded to higher versions but they cannot be downgraded.
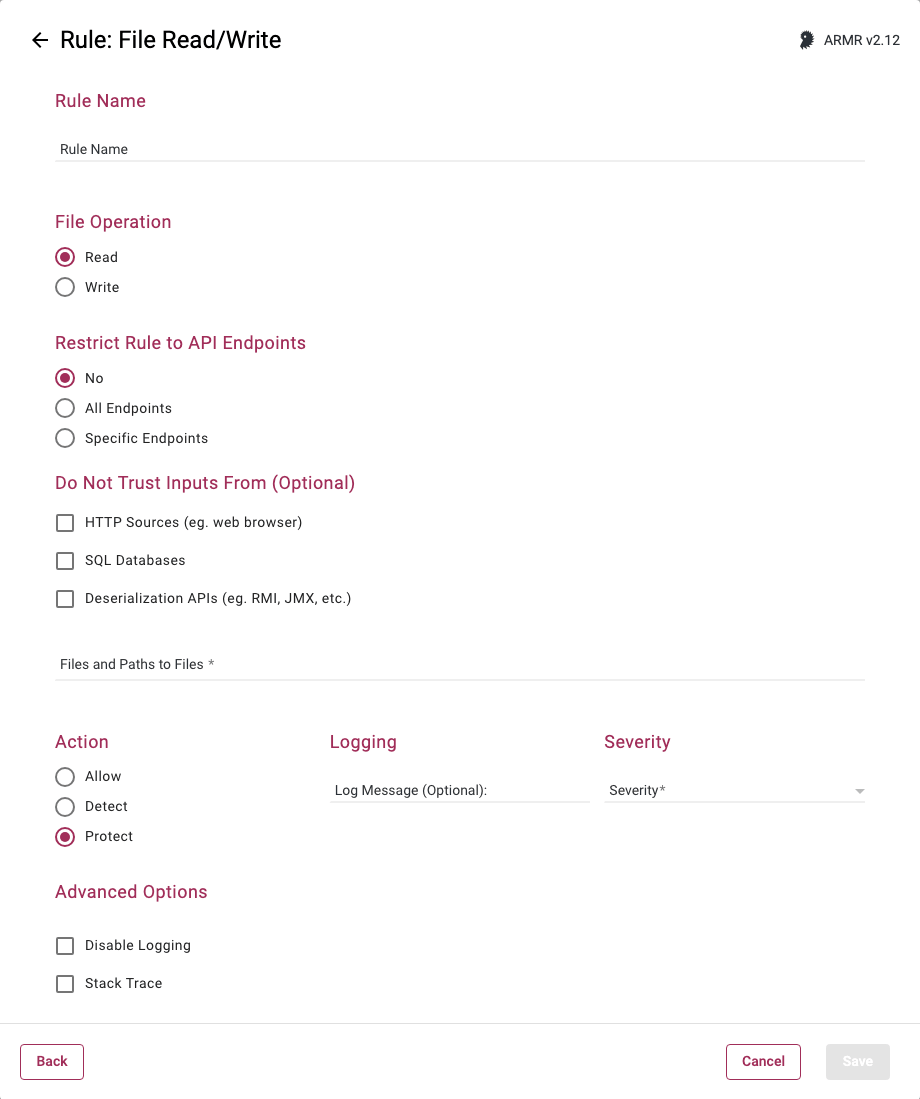
To demonstrate how this process works, we're going to walk through a commonly implemented rule type: the File Read/Write Rule.

Once you click Next, the File Read/Write form will appear for you to complete. Here you can:
- Name the Rule
- Choose the file operation
- Set the file paths (one or more)
- Set the rule to allow, detect or protect when your path file is accessed. In a test setting, we typically set this to Detect.
- Add a Log Message or Disable Logging (see Advanced Options)
- Set the alarm severity
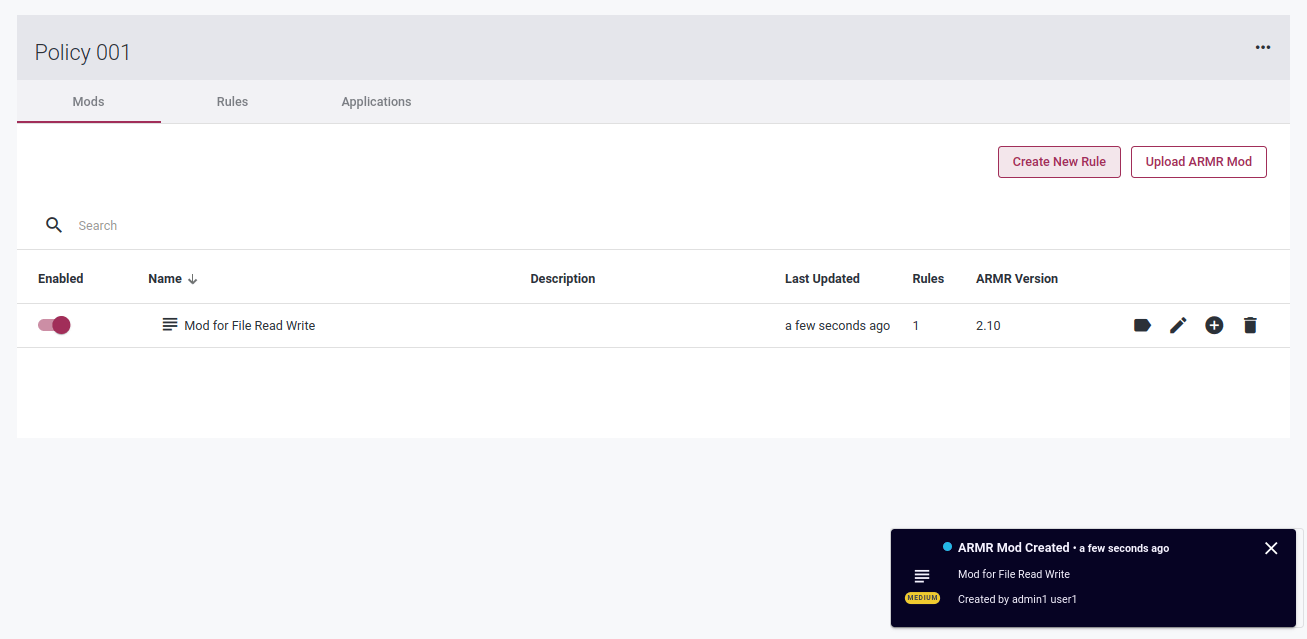
Once you have completed the form, you can click Save to exit. Several things will happen as a result of this action:
- Your rule will have been created
- A mod will have been automatically created for the rule with the name format ‘Mod for [rule name]'
- A navy notification message will appear for a few seconds in the bottom right of the screen confirming the creation of the new rule. This notification is logged in the notification panel; available for later reference by clicking on the chat icon in the main navigation bar at the top of the page.
4) Attach your Policy to your application
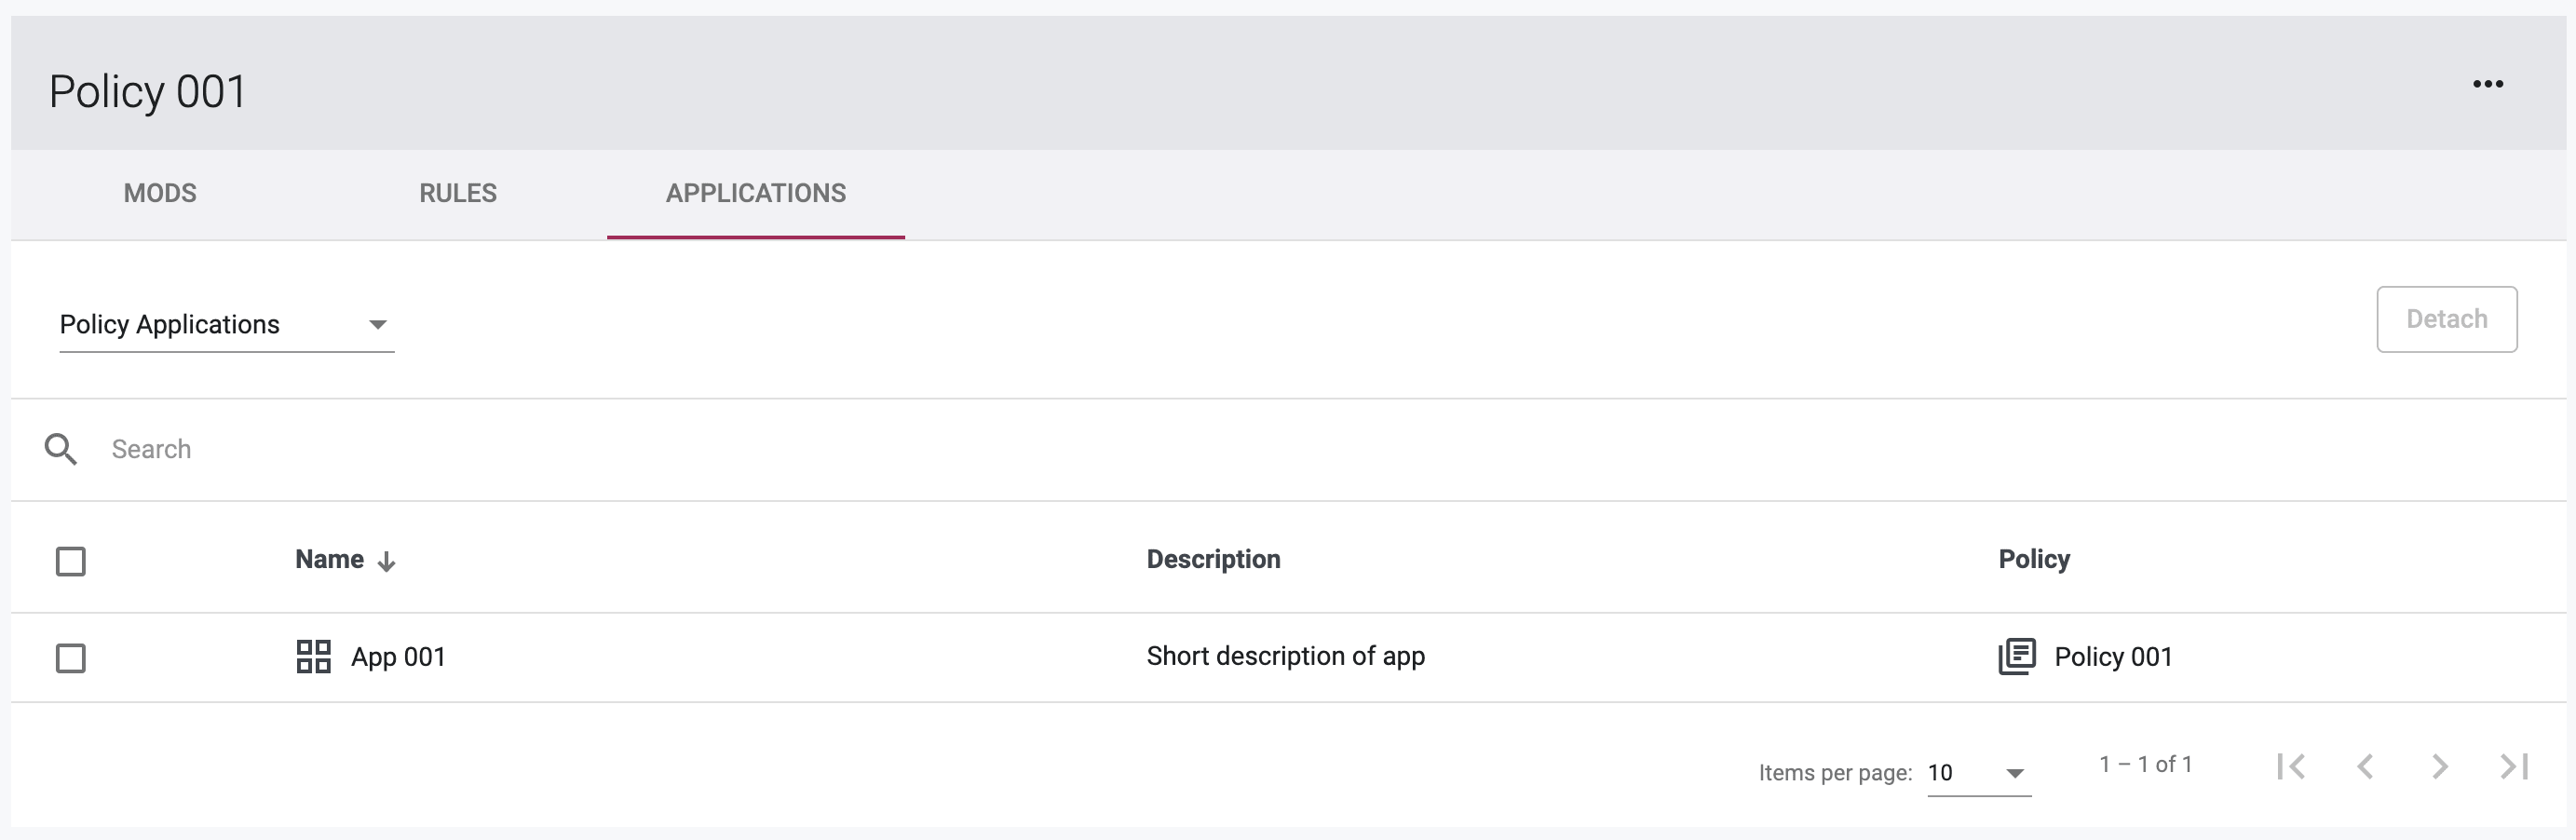
You can attach your policy to your application from within the policy details page. Select the Applications tab to open the Application View. This page will be empty initially as you have not attached your policy to your application yet. To find your application, update the page view to show all applications not attached to this policy. You can do this by selecting the dropdown above the searchbar and choosing Other Applications.

Once the page updates to show all other applications, select the checkbox beside the application you created earlier and click on the Attach button in the top right of the screen. A confirmation screen will appear to confirm this action so you may select Save Changes to complete the action. The application will then disappear from this view and can then be found on the Applications tab, as shown below:
Onboard an Agent to execute your ARMR rules
Configure your Agent
To onboard an agent to the Portal, you will need to configure the Agent to connect to the Portal Host using an access key and secret key. The Portal Host is: agent-api-2.waratek.com.
If your environment uses a restrictive firewall, see Network Requirements for the full list of domains and IP ranges to allowlist.
To create an access key and secret key, click on Agents in the side navigation of the Portal and then select the Credential tab underneath to create an access key. For more details about this process, please refer to the Waratek Agent's Installation Guide.
Once the agent configuration is completed, the agent will register with the Portal. The agent will now appear under the Agents tab in the Portal UI.
Assign your Agent
Automatic Agent Onboarding: This process assigns your Agent to an Application for you. You will need to provide a controller key found on the Portal interface to facilitate this process. Open the Applications tab in the Portal and click on the Application icon of your choice to open the specific Application page. Next select the Configure tab to find the key that you need. You can copy or regenerate the key as required. For more details, refer to the Waratek Agent's Installation Guide.
If you choose this approach, you can move on to the next step in this document.
Portal Agent Onboarding: To assign your agent to your application, click on Applications in the side navigation. Open your application (in this example App 001) by clicking on the application name in the name column.

Once the Application page opens, you will see a card with the application name and the attached policy name underneath. Underneath are three tabs; Overview, Agents and Configure.

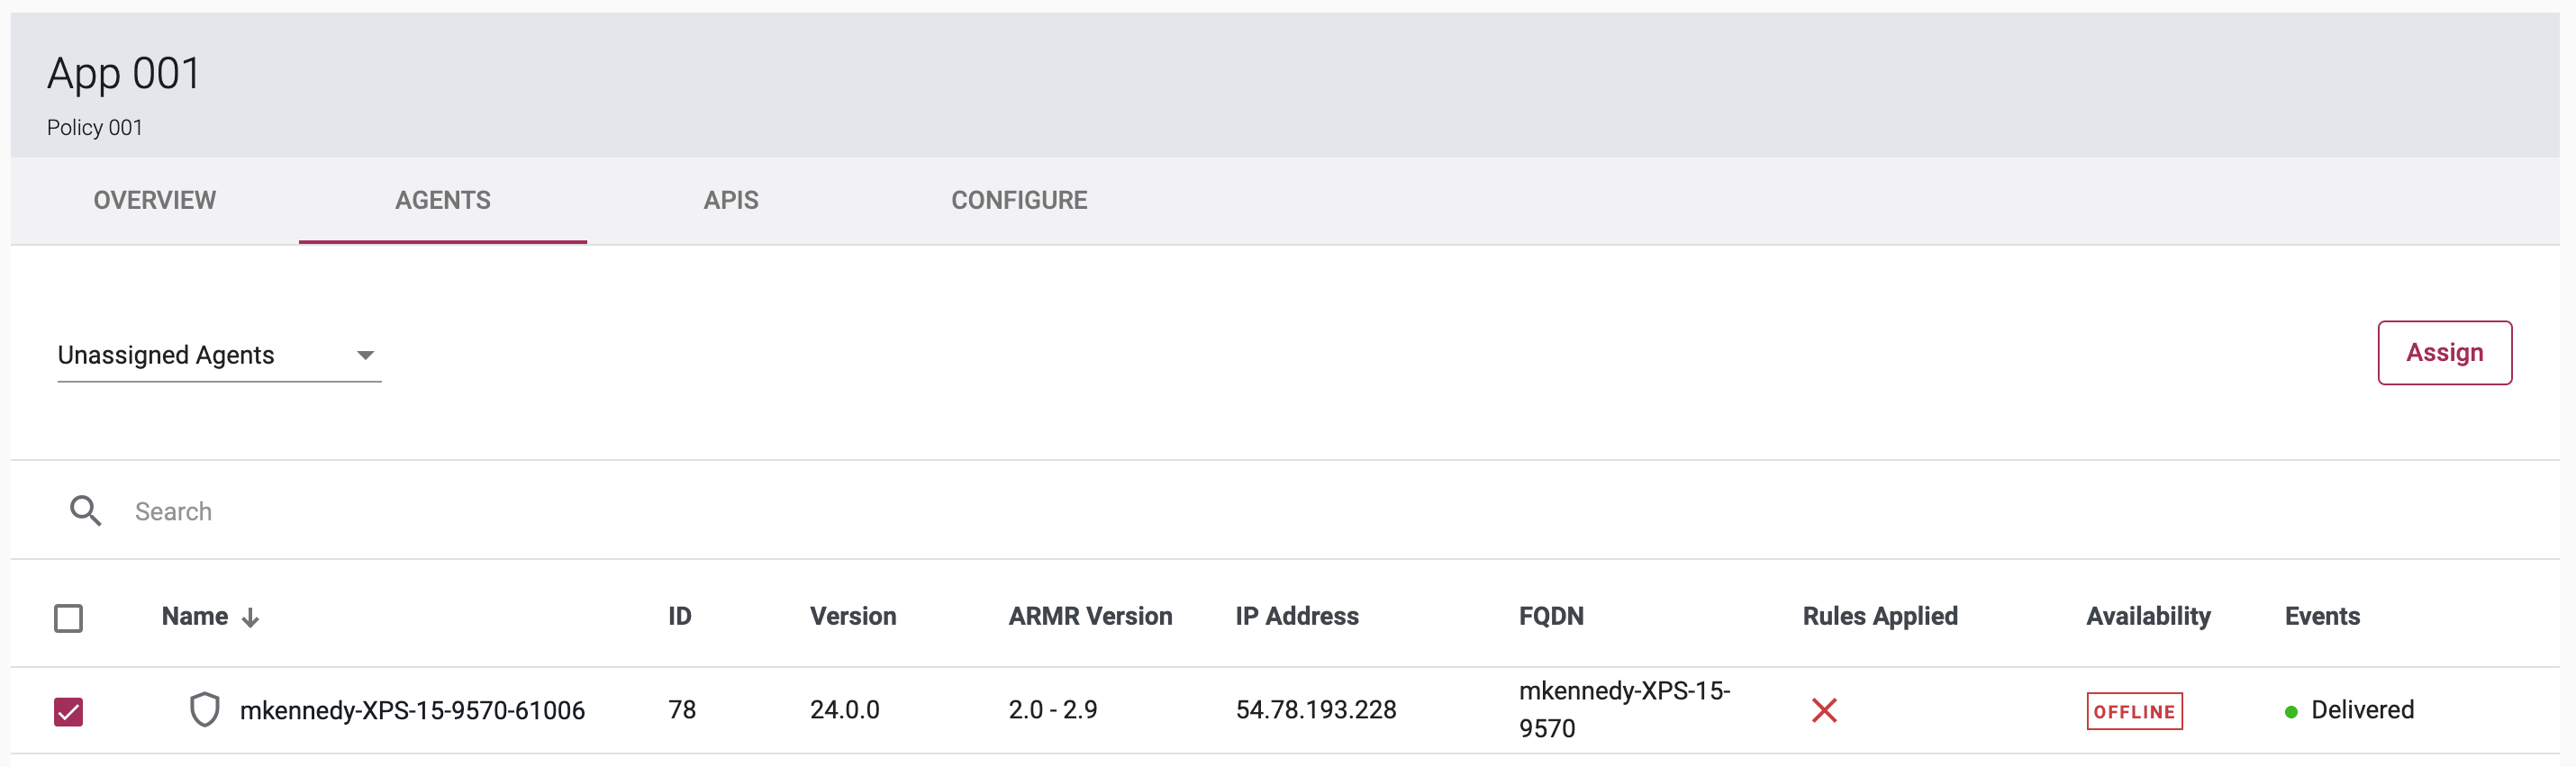
Select the Agents tab to open the agent view within your Application. Next, update the page view by selecting Unassigned Agents from the dropdown menu in the top left of the card. This will provide a list of Agents on the Portal that have not yet been assigned to an application.
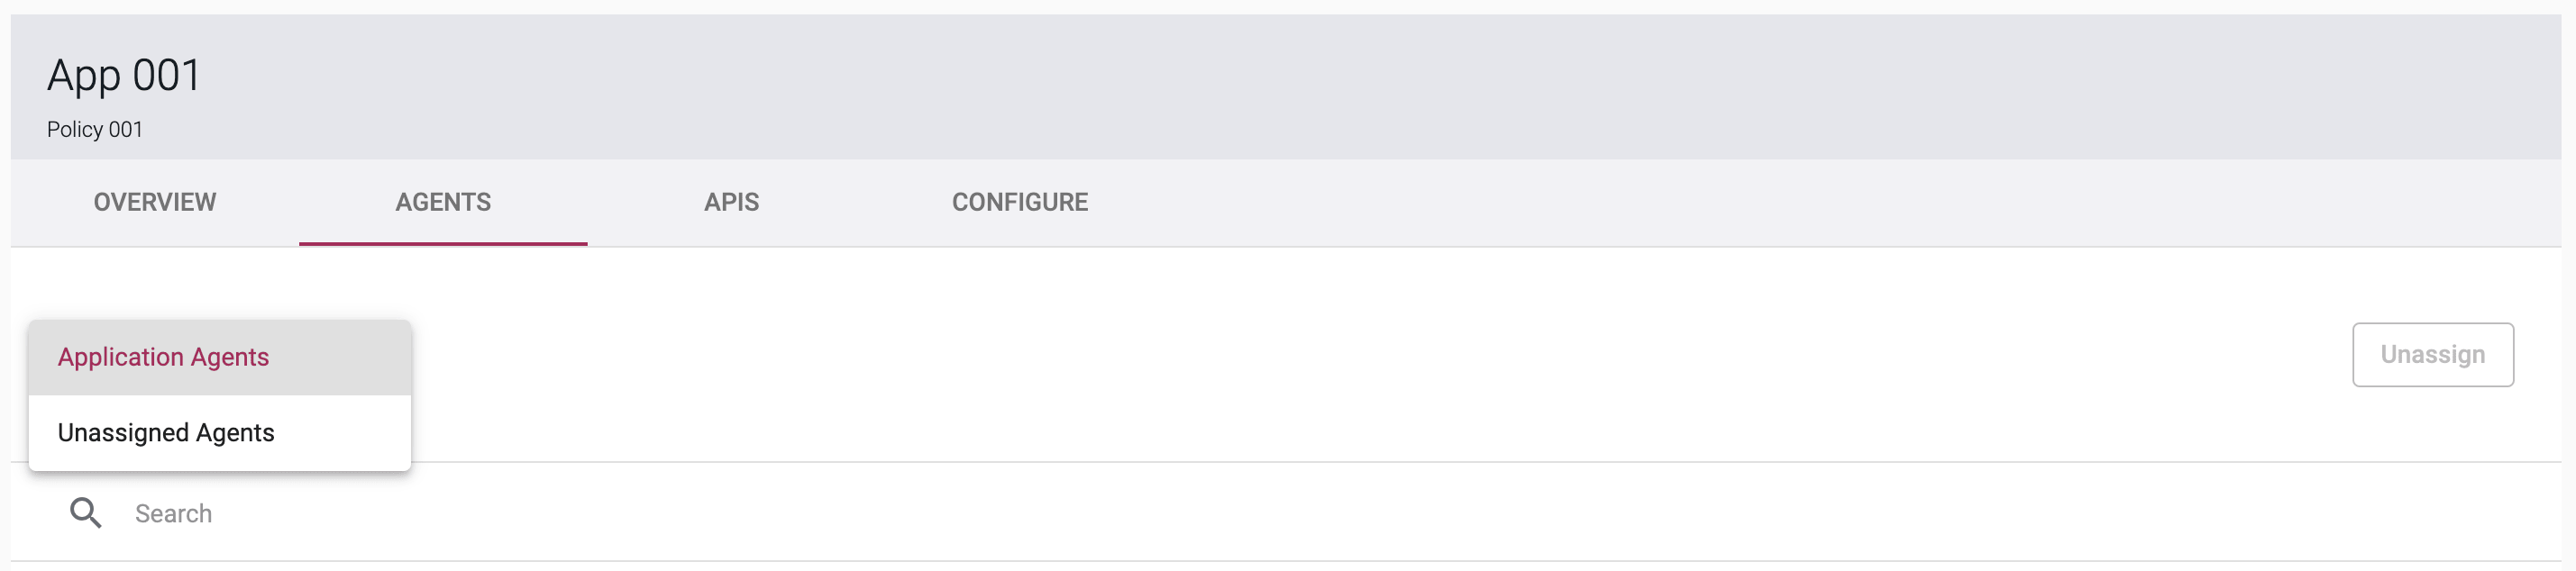
Lastly, select the checkbox beside the name of the agent you want to assign (see image below) to your application and select the Assign button. A pop-up modal will appear to confirm this action, click on Save Changes to complete the process.
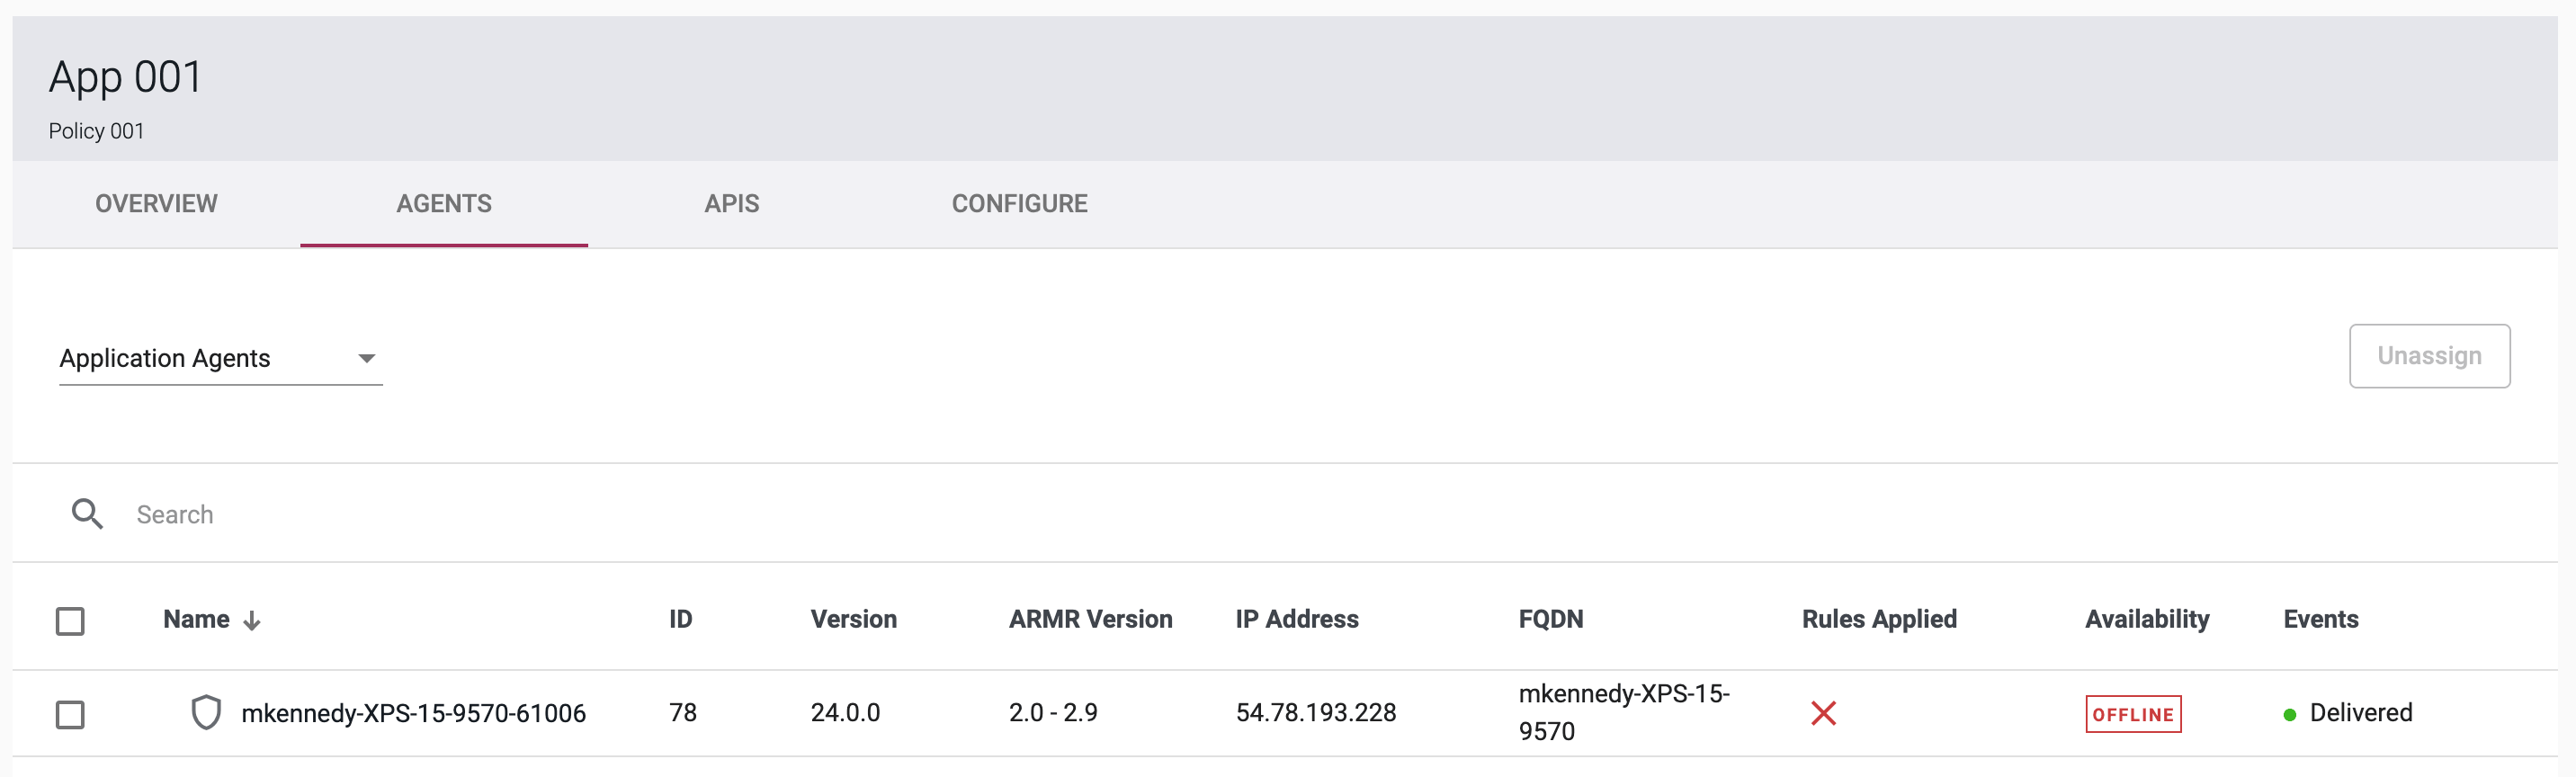
Once an Agent is assigned and online, the Rules will be synchronized to that Agent and in effect. This is displayed in the Agents Table (below) of an Application; under the Availability and Status columns. The total number of online Agents and the total number of Agents with Rules In Sync are displayed on the Dashboard in the Agents' summary card.
Review, search and sort event data
Dashboard
The dashboard page provides you with a global overview of data across the Portal. Each summary card includes links out to the relevant Events, API Discovery Settings, Applications, Policies, and Agents pages if you wish to know more or make some adjustments.
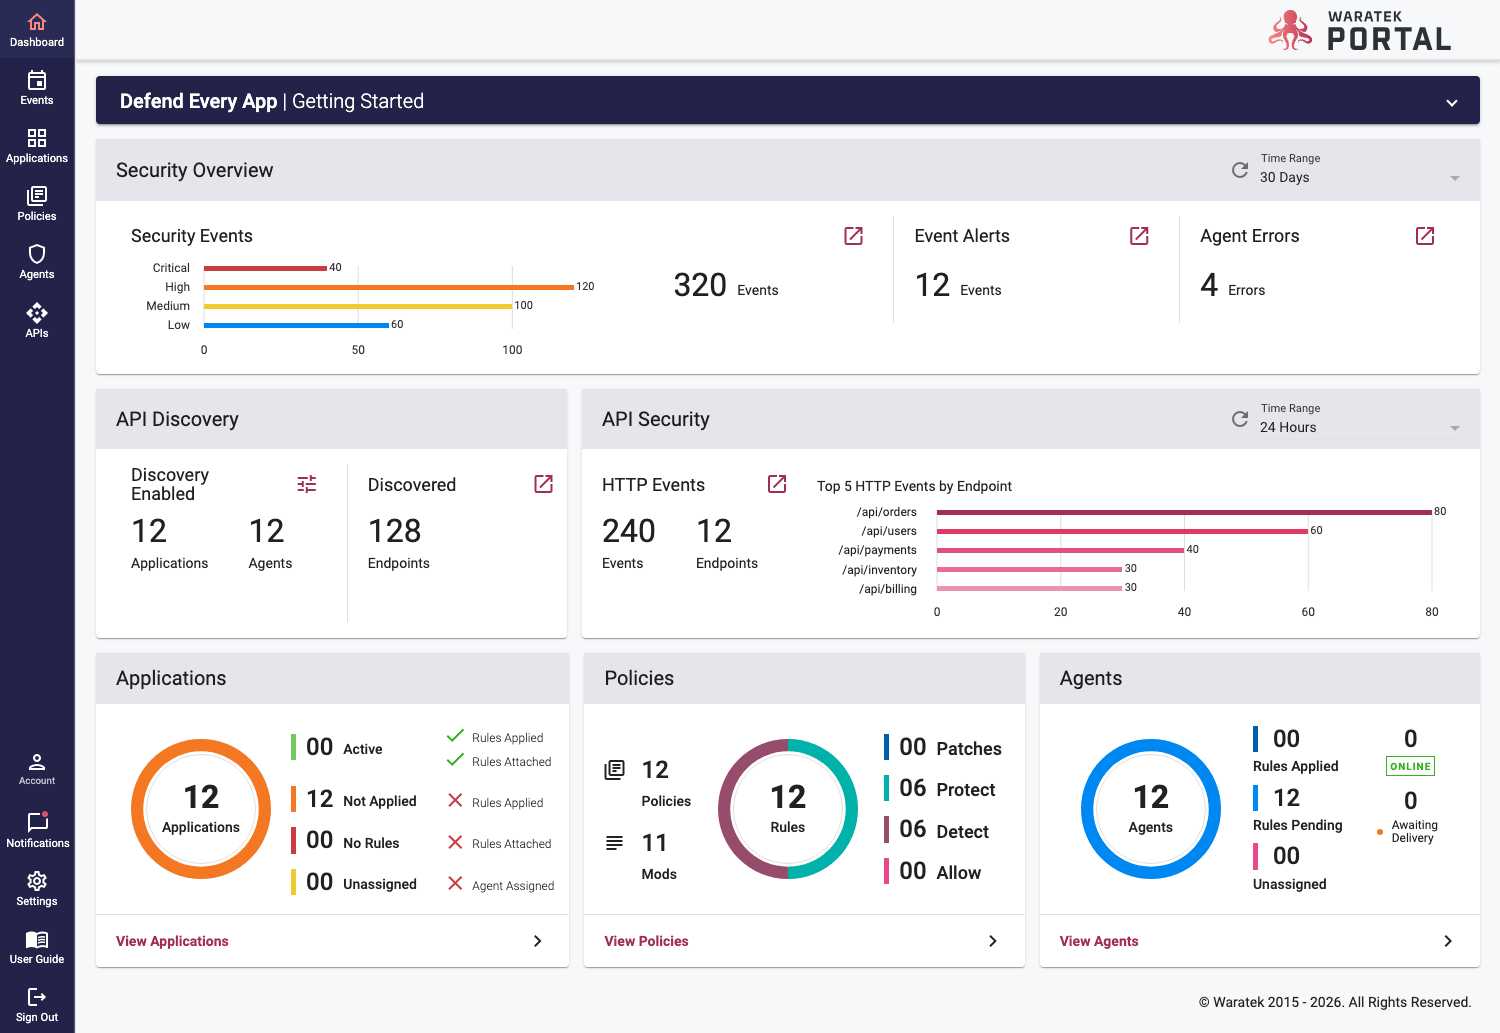
Clicking any one of these page links will bring you a table view; each has the same functionality for searching and sorting data within those tables. You can search by a column keyword in the searchbar and/or sort the results using the sort icon (up/down arrow) beside the title of each column.

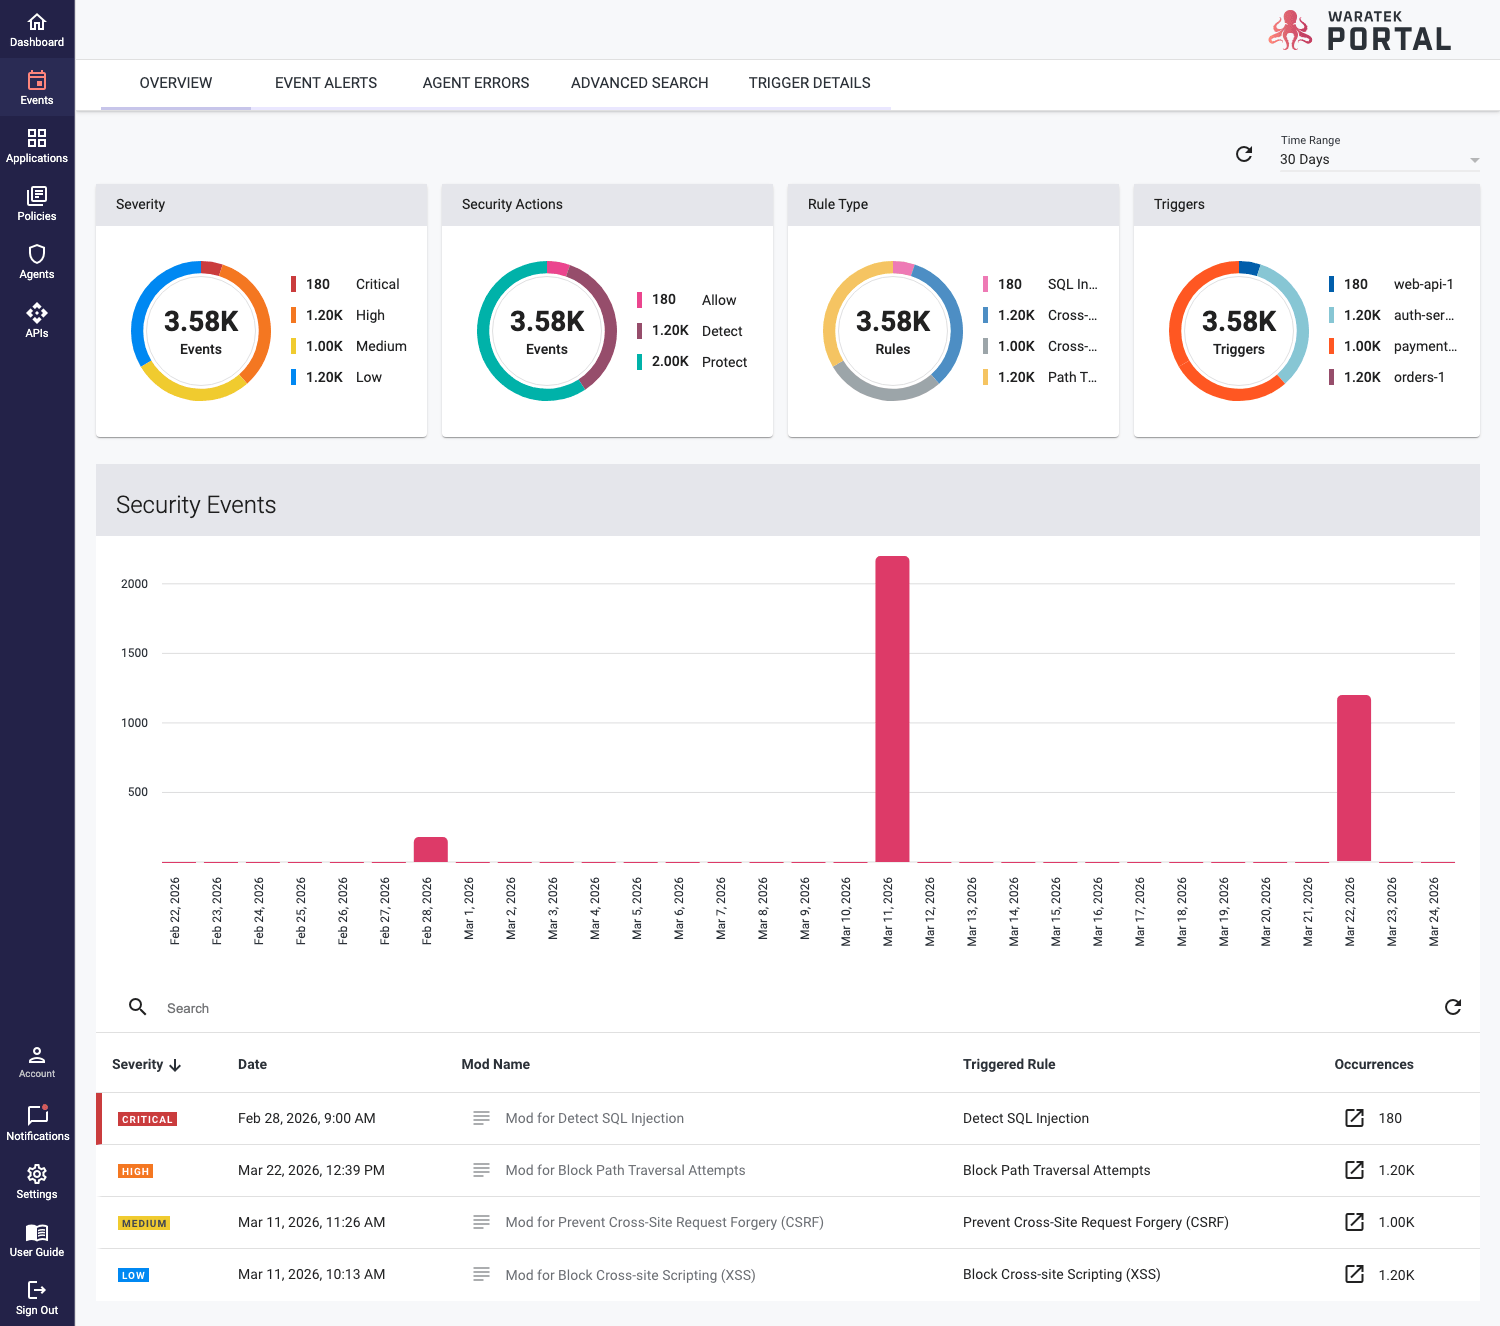
Events
The Events Overview page has additional functionality - here you can filter the donut charts, bar chart, and table using predefined times from a dropdown list. The page can be filtered by the last 24 hours, 7 days, or 30 days. A filter is available within the interactive bar chart - clicking on any of the bars will narrow the focus further; click on a day bar and the timeline will update with a breakdown of that day in hours. Click on an hour bar and the table underneath the chart will narrow its results to within that hour window.
Advanced Search
When you click on the Occurrences icon  in any of the table pages under the Events tab, that event row will open a full event list on the Advanced Search Page, with advanced search filtering provided at the top of the page. These filters can narrow the event list by:
- Start and End Date
- Application
- Agent
- Mod Name
- Rule Type
- Triggered Rule
- Severity
- HTTP Path
- HTTP Method
Lastly, you can export your filtered results to a .csv file by clicking the Export button in the top right corner of the page.
