Applications
You can use the Portal to organize an Agent into a group, called an Application. You can create new applications and monitor the activities of each application using the Portal.
Create a New Application
- Click the Applications tab
- Click the New Application button
- In the new application pop-up, enter the application name, description, select operating system, database, and policy from the drop-down menu
- Click the Create button to create a new application
The New Application dialog may include a Team selection option if there are Teams in the system, see Settings → Teams for more details
Delete Application
- Click the Applications tab
- Find the application and click on the icon
 beside the name of that application
 - Click the Delete Application button
Application Activity
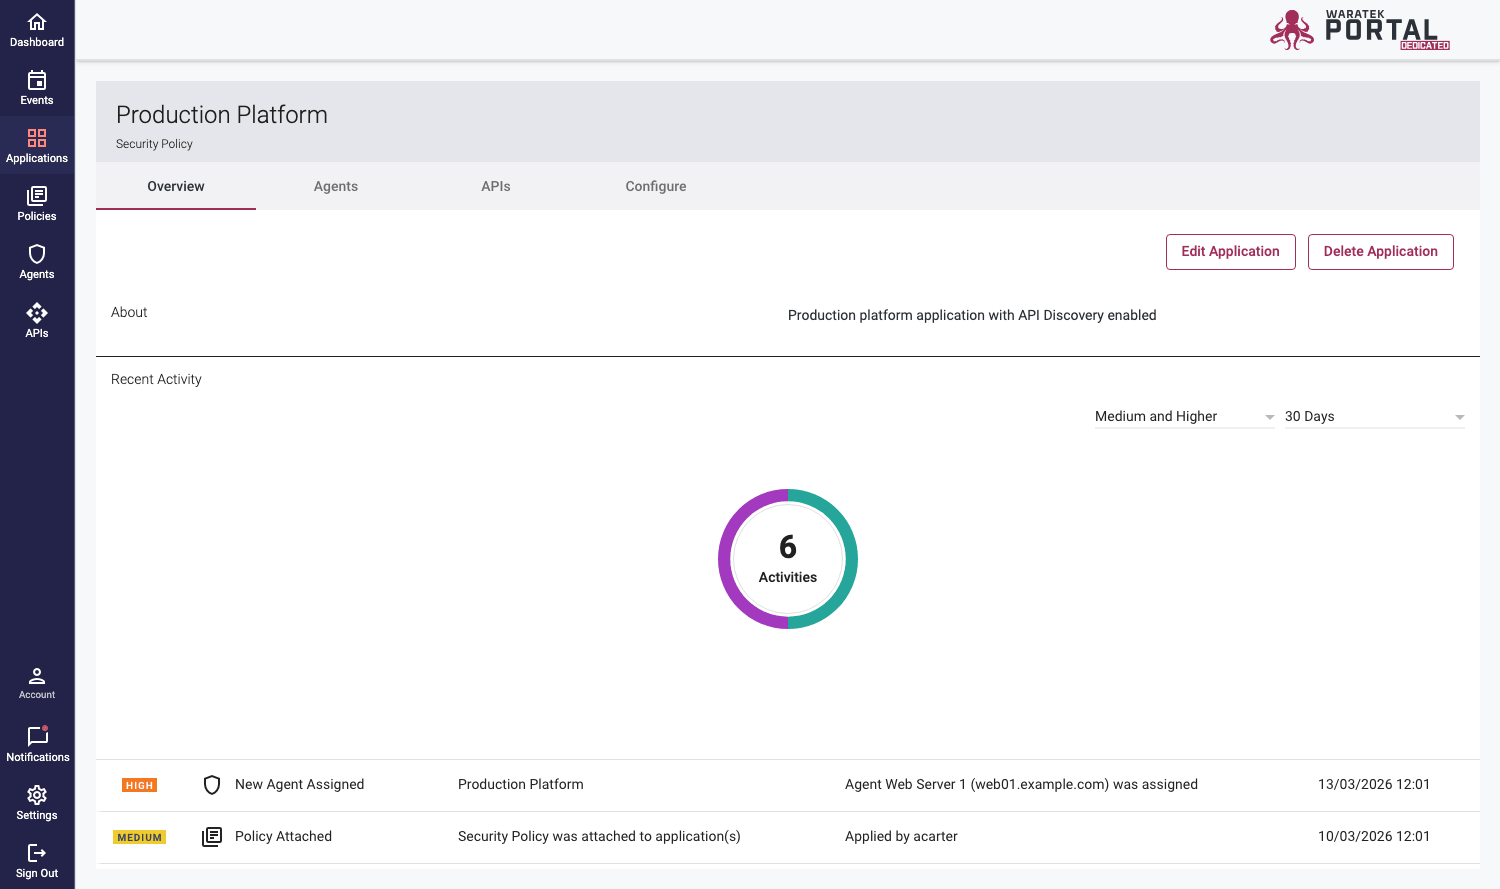
The historical activity of any application can be seen when you select any application name from the list on the Applications tab. This opens the applications details page which defaults to an Overview sub tab with a donut chart and table display all recent activity. Like other tables throughout the Portal, any name with an icon is a link directly to the source item listed.
Assign and Unassign an Agent
Assign an Agent:
- Click the Applications tab
- Find the name of the application to which you want to assign an agent. Click on the icon beside the name of that application
- In the application detail page that opens, select the Agents tab
- Next, choose the Unassigned Agents view from the dropdown menu in the top left of the screen
- Select the checkboxes beside the agent(s) you wish to assign
- Click the button Assign to designate the agent to your application
- Click the button Save Changes on the pop-up modal that appears to confirm changes
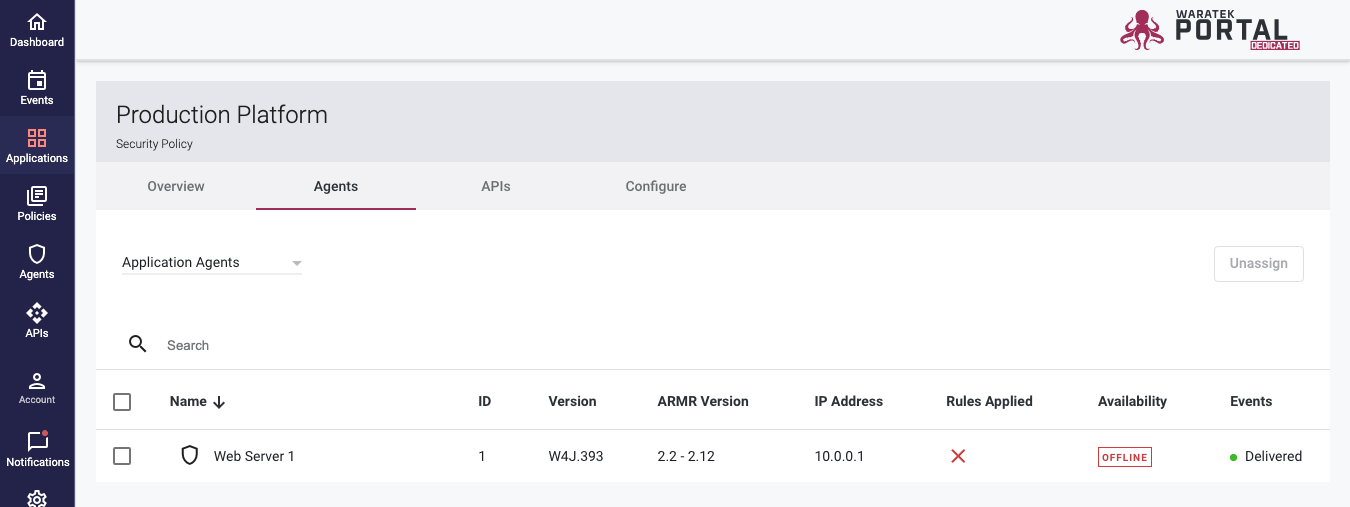
Unassign an Agent:
- Click the Applications tab
- Find the name of the application to which you want to unassign an agent. Click on the icon beside the name of that application
- In the application detail page that opens, select the Agents tab
- The Application Agents view on the dropdown menu will load be default
- Select the checkboxes beside the agent(s) you wish to unassign
- Click the button Unassign to confirm the action
- Select the button Save Changes on the pop-up modal that appears
Agent Events
Agents are limited to sending 600 events every minute to the Portal. The Portal automatically de-duplicates identical events which occurred within the same 5 second period before adding them to the events queue.
When a rule is created with a wildcard (*) path, this triggers events across all paths and files which can result in a continuous high volume of events. To optimize security performance, we recommend whitelisting the known paths identified by the wildcard and disabling the wildcard rule as soon as possible. If a wildcard path is allowed to run for an extended period of time, a significant backlog of events will be noted on the Events column of the Agents table as shown:

Updating an Application
- Click the Applications tab
- Search the application and then click the icon beside the name of that application
- Click the button Edit Application
- Enter the updated information in the edit application dialog that appears
- Click the button Update
API Details
The API Table lists all the endpoints discovered by the Portal that connect to the specific application. The table details the HTTP method, path, agents, controller and last discovery time for each endpoint. At the top of the table, Administrator and Editor profiles can toggle on/off API Discovery for this application only.
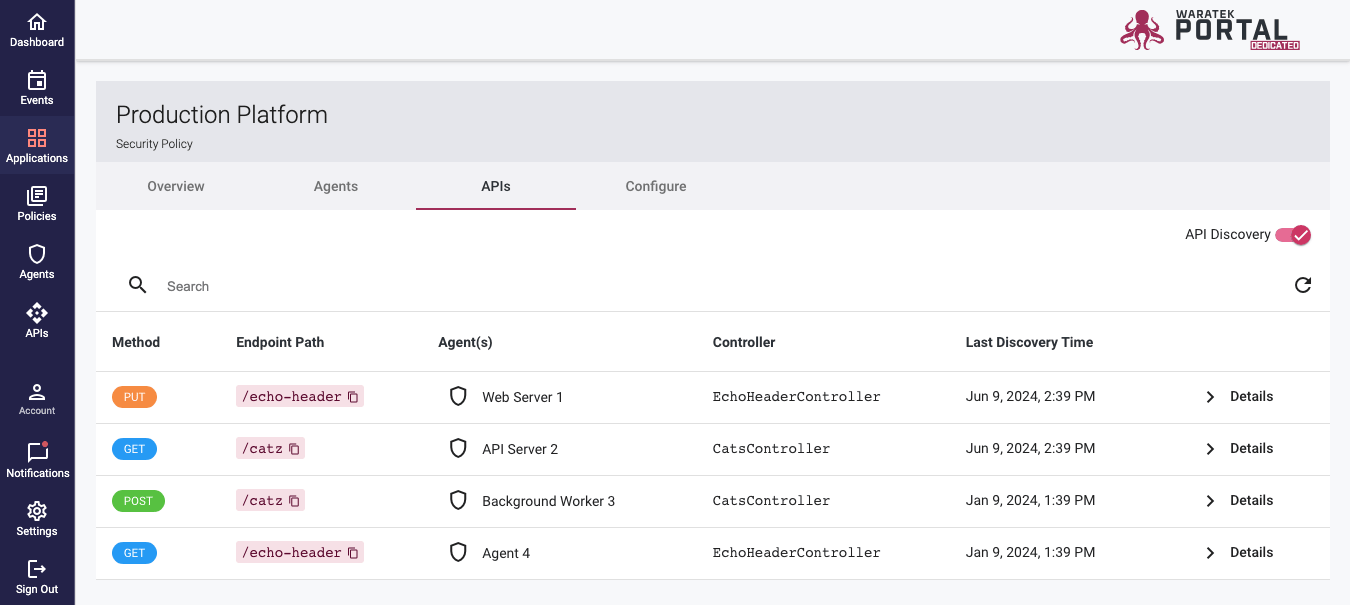
When you click on the Details link in any row of the table, a side panel will appear with more details. Endpoint information presented here typically includes:
HTTP Path, HTTP Method, Controller, Discovery Time, Framework, API Type, Events Summary Table, Method Descriptor, Routing Details (.json) and Parameters (author details)
API Discovery Conflicts: When any conflicts arise with the API settings, a banner will appear at the top of the Application table to provide more information. These conflicts could be any one of the following:
- When the global API Discovery Settings are disabled, a warning banner will appear in the API page for every Application and a link to the API Discovery Settings modal will be provided to resolve the conflict

- When API Discovery is enabled but the Agent(s) assigned to an Application have a conflicting discovery setting to that of the application, a banner will appear in the API page with an expandable list of the conflicting agents

- API Discovery must be enabled in order to display the latest API endpoints. Click the switch to enable it for this application

- When the global API Discovery settings are enabled but the Application settings are disabled, a yellow banner will appear to notify you of this conflict.
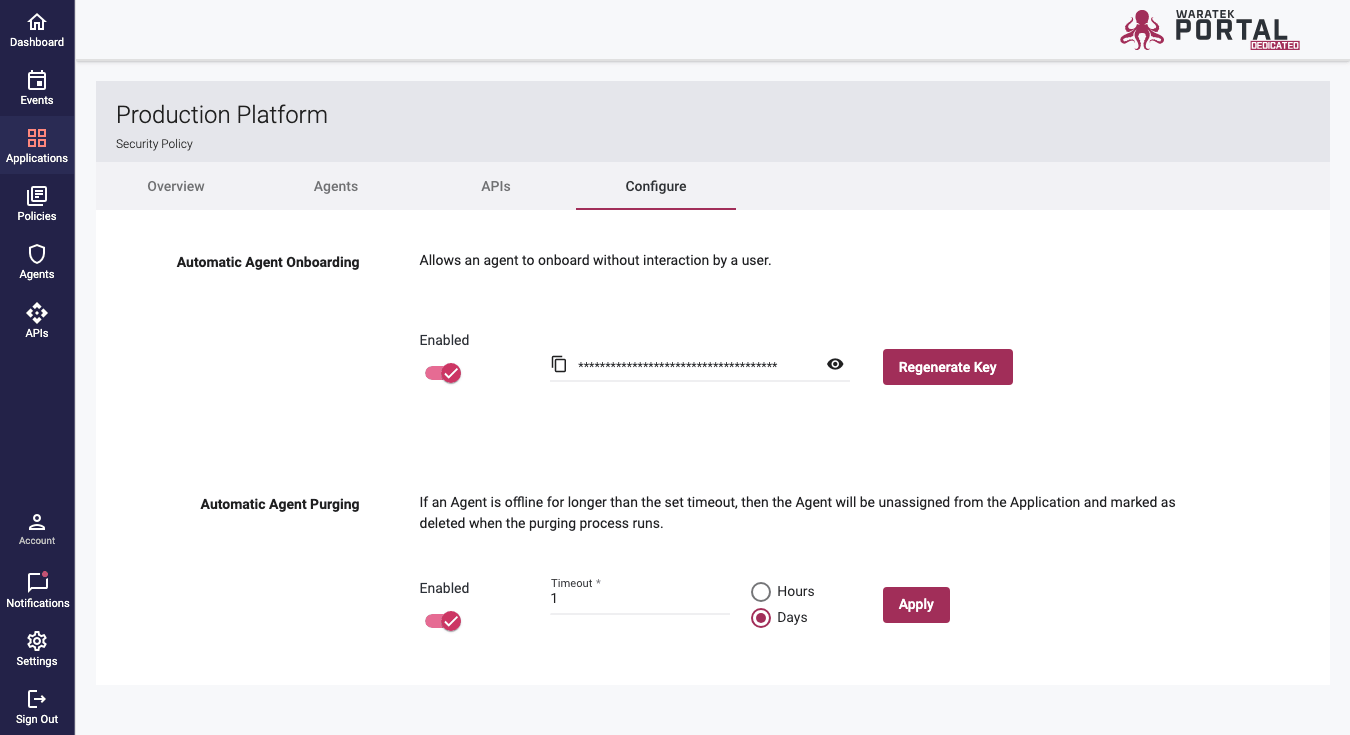
Automatic Agent Purging
From the Application tab, click on the Configure tab.
The agent purging feature is mainly geared toward environments with high agent volatility, such as cloud or other on-demand services where new agents and the services that they are protecting may be created, spun up, and subsequently spun down with regularity. In such an environment, these temporary agents will spin up, onboard to the Portal, and when they are spun down, they remain in the Portal even though those agents will most likely never come back. However, the Portal has no way of knowing if an agent is temporary or not. Eventually, the number of “orphaned” agents will continue to grow to the point when manually deleting them is no longer scalable.
The Automatic Agent purging feature solves this by allowing an administrator to automate the purging of these agents. You set the purging interval and if an agent is offline throughout the time specified in the purging interval, the Portal will assume that that agent is likely not coming back and will purge it. Setting this up on a per-agent basis is not a scalable endeavor, however, policies are often developed specifically for these temporary agents, and therefore the purging is applied at the Application level. For example, if the purging interval is set to 12 hours, then any agent assigned to the application under which the purging interval has been configured is offline for over 12 hours, it will be purged and deleted.
The options include the ability to enable/disable the feature and the ability to set the Time interval in units of days or hours.
Once an agent has been detected as offline for longer than the set Automatic Agent Purging interval, it is a candidate for deletion the next time purging occurs. Purging occurs at 3am Portal local time.
Here are some Agent Purging scenarios to demonstrate how the process works:
Scenario 1: The Agent Purging Process runs once a day at 3am
- The transient agent goes offline at 10am.
- At 3am the next morning, the agent purging process is run.
- The purging process sees that the interval is set to 12 hours, and any agent that went offline before 3pm the previous day (in this case, 10am) gets deleted
Therefore, the agent is purged 17 hours after it goes offline (not the 12 hours configured by the Automatic Purging Interval).
Scenario 2: The Automatic Agent Purging interval is set to 12 hours
- The transient agent goes offline at 6pm.
- At 3am the following morning, the agent purging process is run.
- The purging process sees that the interval is set to 12 hours, and any agent that went offline before 3pm the previous day (in this case, 6am) gets deleted. The agent in question went offline after 3pm, so it does not get deleted. However, 24 hours later when the purging process runs again, the agent will be deleted.
Therefore, the agent is purged 33 hours after it goes offline (not the 12 hours configured by the Automatic Purging Interval).