Process Forking
A Process Forking rule prevents a protected application from executing any process that it should not have access to or be allowed to execute.
Overview
This rule could prevent an application from executing telnet, adduser, or rm commands on the system on which it resides. This protection isn't specific to a CWE or other defined or limited attack. The method of attack that causes the protected application to attempt to execute a specific command is irrelevant to this rule. This rule only looks at and potentially protects against the end result of any such attack.
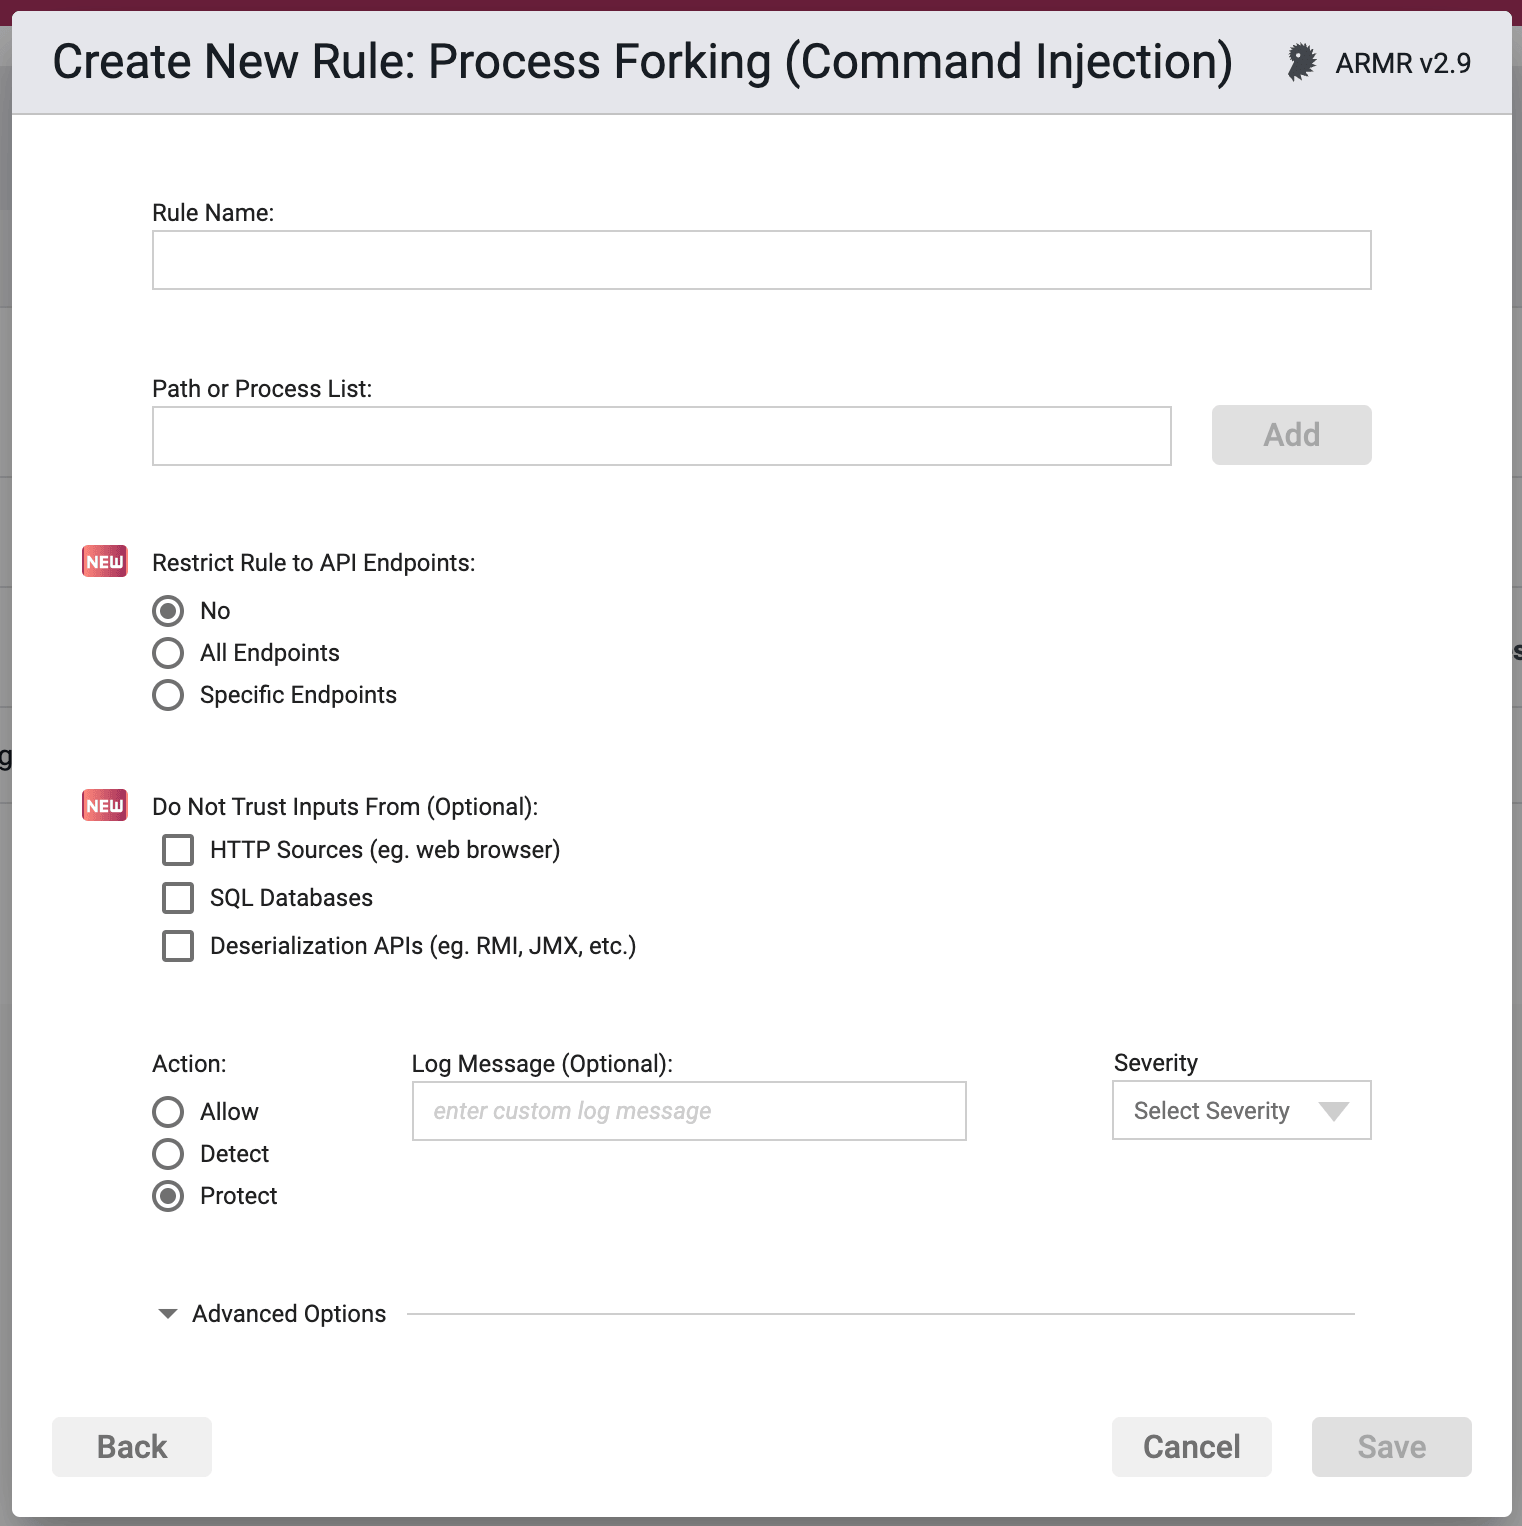
Rule Options
Path or Process List
Here you can type in a path(s) or specific process(es) that the rule will apply to. Generally speaking this can be applied in 2 different ways:
- You can list a number of paths and/or processes (no path required for processes) that they wish to prevent from being executed via the protect action, or
- You can create a pair of rules where the first Process rule uses a path to Protect (e.g. /usr/bin/*), and the second Process Rule allows or whitelists specific processes (via the Allow/Whitelist action) contained within that path, such as
/usr/bin/allowMe.sh.
This way if there are 100 processes in that directory and you wish to protect 98 of them, you do not have to create 98 rules or an unwieldy rule listing 98 processes. You can instead create 1 rule to protect against all of the processes within, and create another rule to carve out the 2 that you want to allow to be executed.
In essence, the Allow/Whitelist option is allowing us to say “Protect all of these Processes” (wildcard protect rule) followed by “Except these” (allow rule) instead of saying “Protect this process” (standard rule, 98 times).
You can type paths or processes into the text field and upon typing a comma or hitting the Return/Enter key the entries will be accepted and converted to a pill object which can then be removed from the list by clicking on the pill's cross symbol (x).
Restrict Rule to API Endpoints
You can limit the rule to respond to API requests only.
- No - Do not restrict the rule response
- All Endpoints - Restrict the rule response to API requests only
- Specific Endpoints - Restrict the rule response to API requests on the specified endpoints
You can change the default value No but you can select only one of these options.
Do Not Trust Inputs From
Protection can be, optionally, limited to lookup that contain untrusted input. If no inputs are selected, protection is applicable to all process forking, no matter how this process was obtained by the Application.
Sources that the strict policy option will treat as untrusted are:
HTTP - Data received by the application from HTTP requests (e.g. from a web browser).
SQL Databases - Data received by the application from a SQL database.
Java Deserialization APIs - Data received by the application via deserialization APIs (e.g. RMI, JMX, Java Object Deserialization, etc.)
It is not possible to create an Allow rule which would only be applicable in the context of processing API requests. Restricting the rule to specific endpoints will remove the Allow action option.
Selecting input(s) not to trust will also remove the Allow action option. The Allow action can only be specified for the path or process list, and it can not be limited to any single trusted input source.
See the API Protect section of the ARMR documentation for further details.
Action
- Detect - Detect - The Agent will detect the execution of listed process(es), log the event to the event database, and the event will be viewable on the Security Events pages in the Portal, but the Agent will take no further action.
- Protect - In addition to the Detect actions, the Waratek Agent will also actively prevent the execution of the process(es) or anything within the protected paths from succeeding.
- Allow - Acts as whitelist. This is similar to the Detect action in that no blocking or destructive action will be taken, however the Allow action will supersede the Protect action by whitelisting processes to be excluded from Protect actions.
Log Messaging
The logs provide a message field, which can be customized. Text entered here is the message that will be seen on the log files when the rule has been triggered, regardless of the Action. If the field is left blank, then the default logging message will be displayed in the message portion of the event log.
Severity
The log files allow you to select a custom severity level for the event: Low, Medium, High or Critical. A severity is required, and there is no default selection.
Advanced Options
Disable Logging - By checking this option, no logging will be performed when a rule is triggered. Subsequently the Portal will not see these events, and they will not appear anywhere in the Portal, nor will they be searchable in Event Storage.
This option will be greyed out if the rule action is set to Detect.
Enable Stack Trace - By checking this option, when a rule is triggered, the stack trace will be included in the event log, and will be available for viewing in the Portal UI for each triggering security event.