Socket Bind
The purpose of the Socket rules is to monitor and control (allow or restrict) network connections for the Waratek-protected application.
Overview
Network connections can be controlled by restricting, monitoring, or allowing connections to or from specific IP addresses, ports, or paired combinations.
Network-based applications that are Waratek-protected will need to communicate with remote clients and servers utilizing TCP/IP addresses and/or ports This is accomplished either by accepting incoming connections (Accept Rule), establishing outgoing connections (Connect Rule), or Binding to local ports in either a server or client capacity.
For example, the rule might be used to deny incoming connections to the Waratek protected application from specific IP addresses, or to prevent the Waratek protected application from even reserving and listening on a network port, or to prevent the application from connecting to specific ports on any machine - for example you might want to restrict a DNS server from communicating on any ports other than 22 (ssh, for admin purposes), 53 (default DNS port for TCP or UDP), or 853 if running DNS over TLS.
The Bind Rule can apply to the Waratek Protected application acting as a server, where the rule can allow, restrict or monitor the local port that the service is binding to in order to listen for incoming connections. The Bind Rule may also apply to the Waratek Protected Application when it is acting as a client, where the rule can allow, restrict or monitor the local port that the client is binding to in order to establish and receive return communications from a remote service.
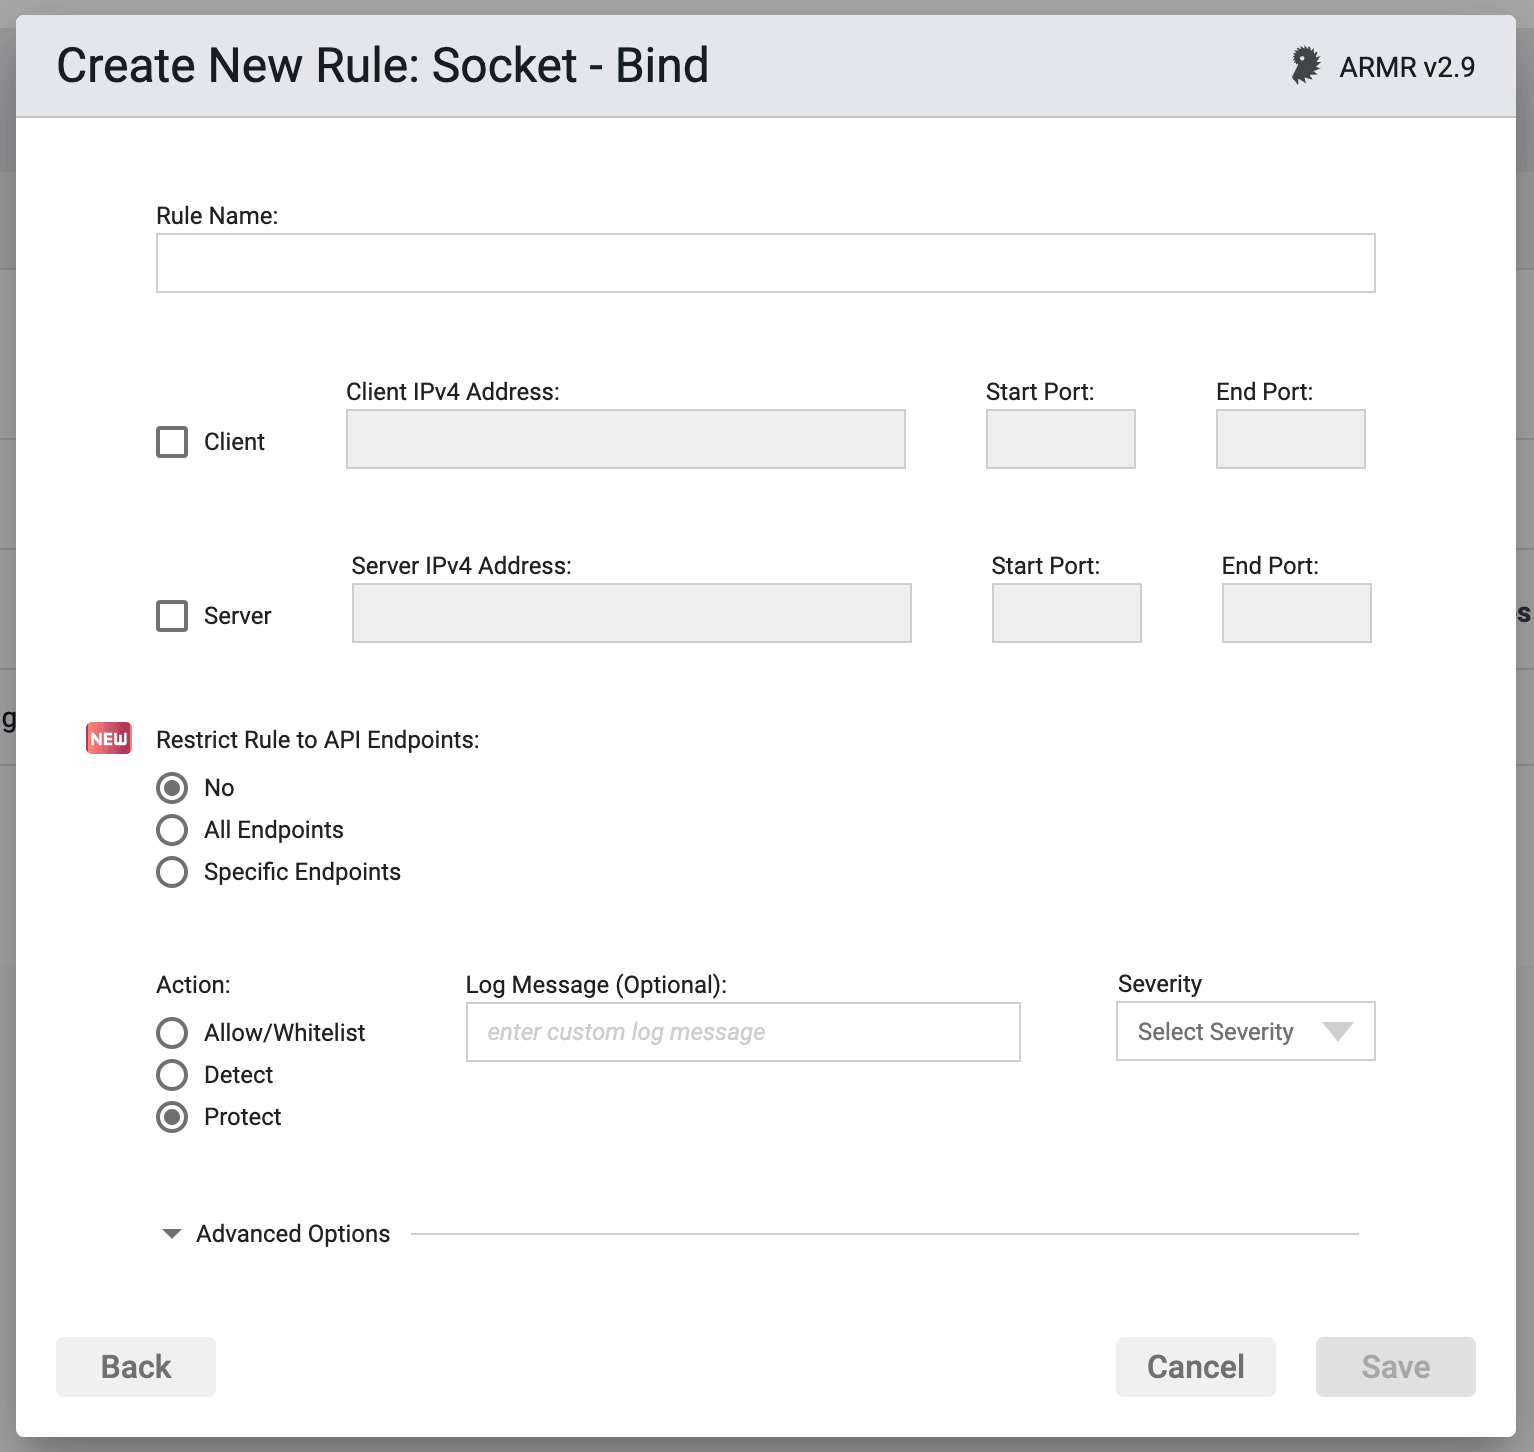
Rule Options
IP Addresses and Ports
Unlike the Accept and Connect rules, The Bind rule maintains a different set of IP Address and Port restrictions:
- This rule can apply (by checking the appropriate box) to either Client actions, Server actions, or both. However, at least one must be selected or an error will result.
- For each Client or Server connection, only a single IP address+port(s) will be allowed, although you may have one IP address for the Client and a different IP address for the Server.
- IP addresses must be IPv4 addresses
- An IP Address value of
0.0.0.0indicates a wildcard value of Any IP address. - A Port value of
0indicates a wildcard value of any port. This field cannot be left blank. - For a single port, both fields should have the same single port number. If you enter a port number in either the start or end ports and the other field is blank, then the number entered will be mirrored in the other port.
- The Start Port must be =< the End Port.
Restrict Rule to API Endpoints
You can limit the rule to respond to API requests only.
- No - Do not restrict the rule response
- All Endpoints - Restrict the rule response to API requests only
- Specific Endpoints - Restrict the rule response to API requests on the specified endpoints
You can change the default value No but you can select only one of these options.
It is not possible to create an Allow rule which would only be applicable in the context of processing API requests. Restricting the rule to specific endpoints will remove the Allow action option.
See the API Protect section of the ARMR documentation for further details.
Action
- Detect - The Agent will detect the attack, it will log the event to the event database, and the event will be viewable on the Security Events pages in the Portal, but the Agent will take no further action
- Protect - In addition to the Detect actions, the Waratek Agent will also actively prevent the attack from succeeding.
- Allow - Acts as whitelist. This is similar to the Detect action in that no blocking or destructive action will be taken, however the Allow action will supersede the Protect action by whitelisting addresses to be excluded from Protect actions.
Log Messaging
The logs provide a message field, which can be customized. Text entered here is the message that will be seen on the log files when the rule has been triggered, regardless of the Action. If the field is left blank, then the default logging message will be entered into the database. This default log message is?
Severity
The log files allow you to select a custom severity level for the event: Low, Medium, High or Critical. A severity is required, and there is no default selection.
Advanced Options
Disable Logging - By checking this option, no logging will be performed when a rule is triggered. Subsequently the Portal will not see these events, and they will not appear anywhere in the Portal, nor will they be searchable in Event Storage.
This option will be greyed out if the rule action is set to Detect.
Enable Stack Trace - By checking this option, when a rule is triggered, the stack trace will be included in the event log, and will be available for viewing in the Portal UI for each triggering security event.