System Settings
Event Alerts
This feature allows you to enable and disable, as well as adjust the event alert settings (notification interval/frequency, event threshold, and type of notification) per severity level. This means that event alerts can be triggered with a more or less threshold sensitivity and more or less frequently (notification interval) so that you can manage the timeliness of notifications and the number of notifications received.
Each rule's severity will dictate which of the severity notification configurations will be applied to that rule.
If there is an error running the event notification task at the scheduled notification interval (such as events cannot be read from the event datastore) an error notification will be sent by the configured notification method.
The following parameters are individually configurable at each severity level:
- Enable/Disable
- Notification Interval
- Event Threshold
- Notification Methods (webhook, email)
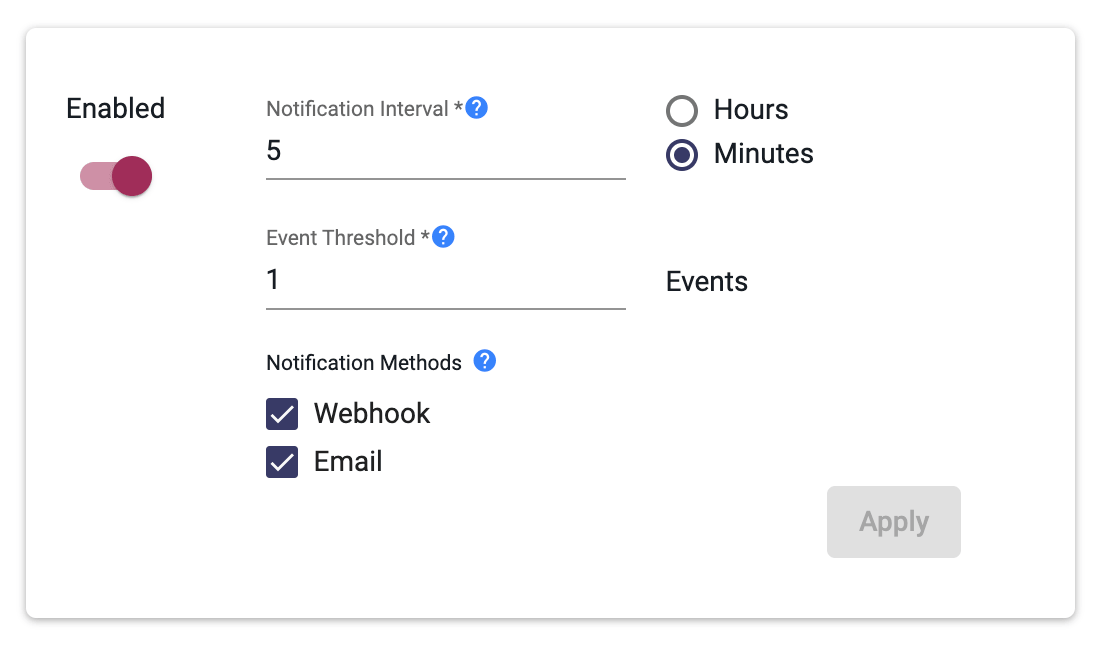
Enable/Disable:
This enables or disables the event notifications for each severity level. When disabled, no event notifications for that severity will be sent via email or webhook.
Notification Interval
This setting adjusts the time period during which a set event threshold will apply for each event severity.
Event Threshold
This sets the minimum number of events required to trigger a notification.
Examples
Example 1
- Low Severity is configured with a threshold of 10
- Low Severity is configured with a Notification Interval of 1 hour
- Rule A is configured with a Severity of Low
- Rule A triggers 8 times within 1 hour (the Notification Interval).
Because the threshold is 10 events within that hour, and only 8 are triggered, there will be no event notifications.
Example 2
- Low Severity is configured with a threshold of 10
- Low Severity is configured with a Notification Interval of 1 hour
- Rule A is configured with a Severity of Low
- Rule A triggers 12 times within 1 hour (the Notification Interval).
Because the threshold is 10 events within that hour, and 12 events are triggered (2 more than the Event Threshold), then 2 Event Notifications will be generated.
Note that the thresholds apply on a per rule basis. In the above Example 1, if Rule B were set with a severity of Low and it triggered 3 times within the same time interval that Rule A triggered 8 times, the Threshold is not met. It must be 10 times for each rule in order to trigger the notification: it is not an aggregate across all Low Severity rules.
Example 3
- Low Severity is configured with a Notification Interval of 1 hour
- The event datastore becomes unreachable
Since the events cannot be read to determine if an event notification should be sent, an error notification will be generated every hour (the Notification Interval). This error notification is intended to communicate that it cannot be determined if there are event notifications that should be sent. The error notification should not be relied on for monitoring event datastore availability. Should that be necessary, it is recommended specialist tools are used for that purpose.
Notification Methods
Webhooks and emails can be selected here. In this case, if either is selected, it will apply to the webhooks and emails that were set up above.
Webhooks
Webhooks provide a mechanism whereby a server-side application can notify a client-side application when a new event has occurred on the server.
Webhooks operate on the concept of event reaction, and thus avoids the need for constant polling of the server-side application by the client-side application. Thus, rather than the client-side application constantly polling the server-side application to check for new events, the server-side application calls the client-side application (by invoking a client-provided webhook URL) anytime the server-side has something new to report to the client. Thus, with webhooks, you can get push notifications when certain events happen on the server. You do not need to poll the API anymore to see if these events have happened. You can subscribe to an event with webhooks.
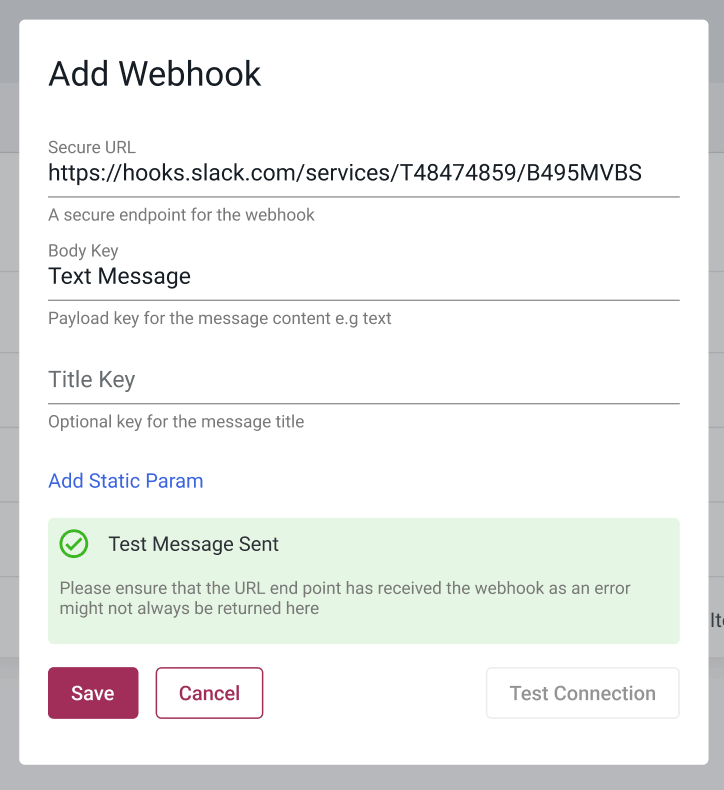
Set Up the Webhooks
- Click the Settings icon
 at the top-right corner of the main interface
 - Select the System Settings from the pop-up menu
- Select the Webhooks tab
- Click the Add Webhook
- Fill in the required information for each field
- There is an option to Test Connection before completion
- Click Save to create the new Webhook
Event Storage
This page contains settings relating to events storage. This feature can be useful when you would prefer to only retain event data for a specific number of days. Once events have been deleted, they cannot be recovered.
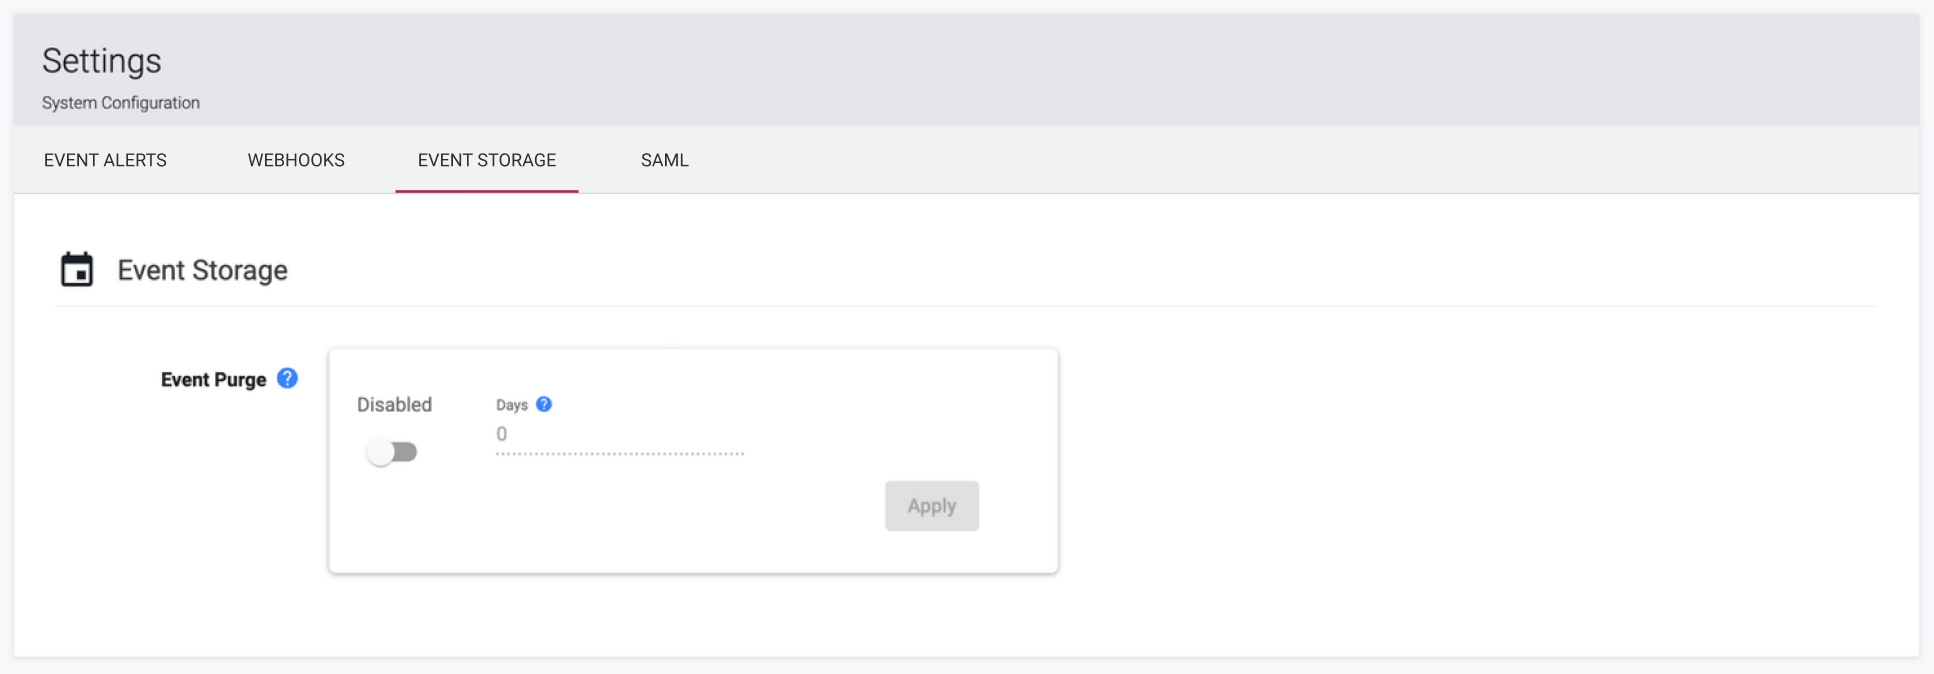
The event purging task runs every day at 4am local time by default. When the event purging setting is enabled and the task runs, events older than the number of days specified will be deleted.
Note that if 0 days is specified, only the current day's events will be preserved when the task runs. If the task runs at 4am then events between 12am and 4am will be preserved. All other events will be deleted.
If 1 day is specified, the current and previous day's events will be preserved. All other events will be deleted.
SAML
This section details the steps and settings required to integrate with SAML to provide Single Sign On (SSO).
How to Configure a SAML Identity Provider
Only one IdP (SAML Identity Provider) can be integrated with the Portal at any one time
Your IdP system can only be fully configured after the IdP has been linked to the Portal, but the Portal needs the IdP metadata in order to be fully configured. This is a chicken-egg kind of problem, which can be overcome using the steps below.
Steps
- In your IdP system, setup the SSO configuration with dummy values for the Entity Id and the Assertion Consumer Service, e.g.:
Entity Id:
https://portal.waratek.com/saml2/dummyAssertion Consumer Service:https://portal.waratek.com/saml2/sso/dummy - In your IdP system, export the provider metadata.
- In the Portal, add an identity provider using the SAML Identity Provider feature which is described below, using the exported provider metadata from Step 2.
- In the Portal, export the metadata using the SAML Identity Provider feature which is described below. This metadata will be different from the one you exported from your IDP system in Step 2.
- In your IdP system, update the SSO configuration with the correct Entity Id and the Assertion Consumer Service from the metadata exported in step 4, replacing “dummy” with the encoded provider ID. Or import the Portal metadata into the IdP.
The encoded Provider ID generated by the Portal will change every time an IdP is added to the Portal, so the corresponding value needs to be updated within the IdP each time.
SAML Identity Provider
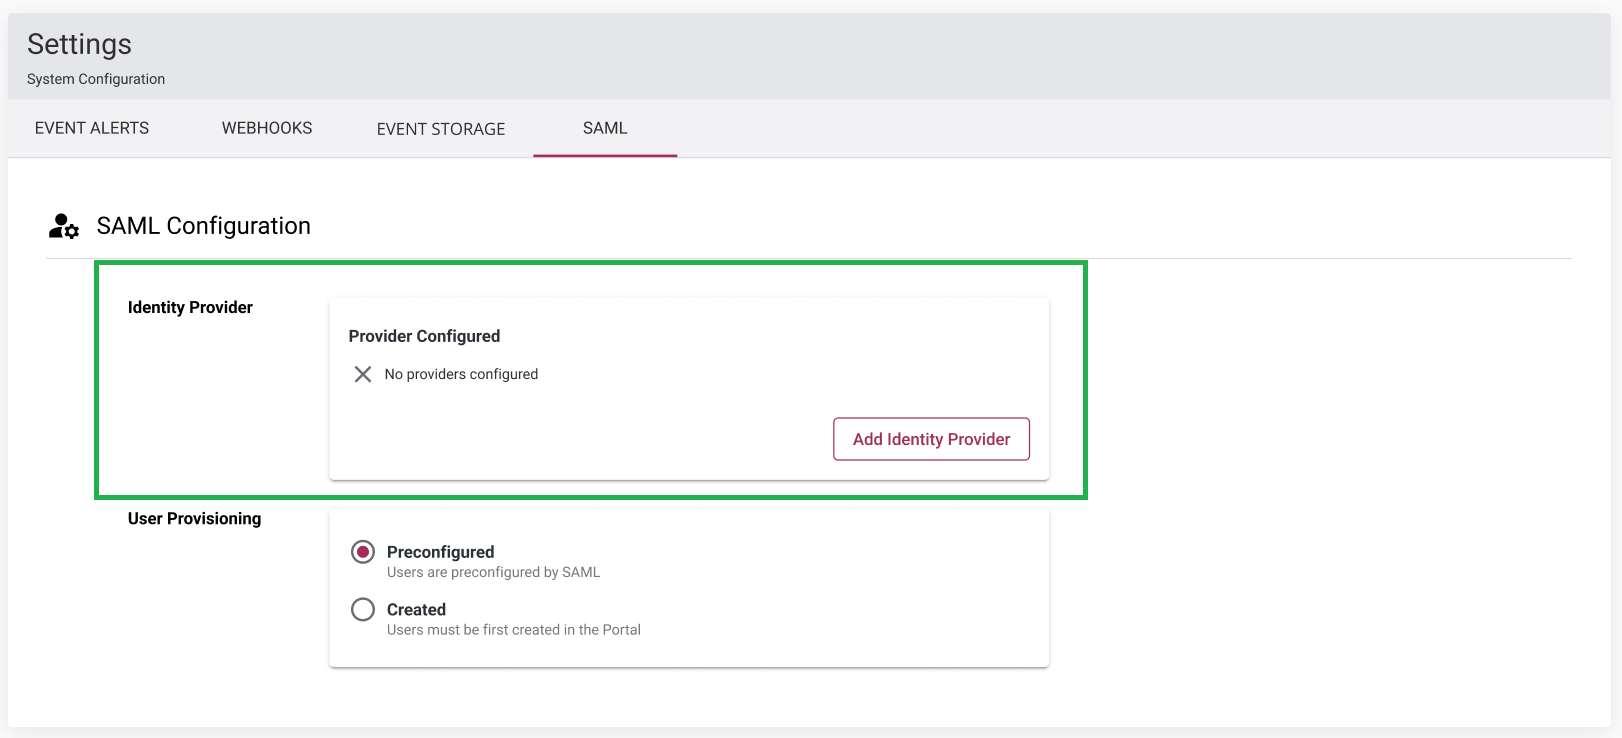
To add a SAML IdP to the Portal, click on the Add Identity Provider button, enter a name for the provider, upload the IdP metadata then click Save. Once this is done, the card will look as follows, containing the provider name, an enable/disable button, a delete button, and a button to export the metadata xml:

Once an IdP has been added, a Use Single Sign On button will appear on the Account Sign In page, which allows users of type “SAML” to log in via SSO:

User Provisioning
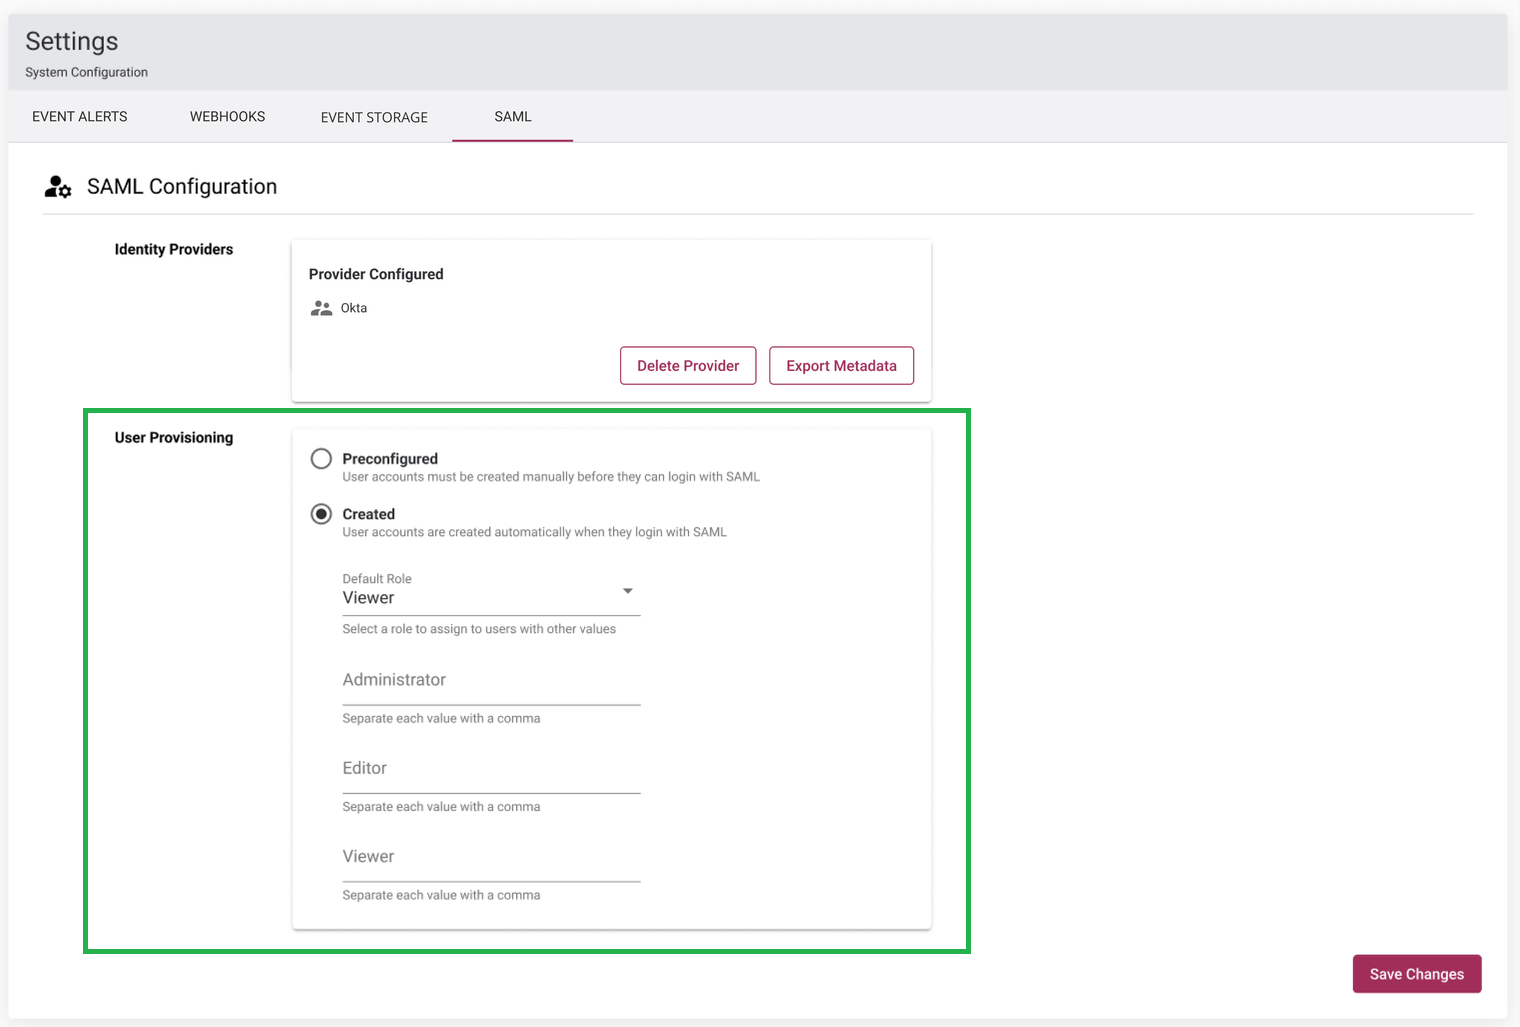
Only Portal Users with an Authentication Type of “SAML” can login using the SAML SSO.
There are 2 ways Users of this type can be created:
-
Preconfigured: An Admin manually creates each User account ahead of time, specifying SAML as the authentication type. See “User administration” section for more details.
-
Created: A User account will be automatically created the first time a User logs in successfully via SAML SSO. Extra configuration allows created accounts to be configured with a Role.
- The Default Role field specifies which role a user will have when they login via SSO.
- Additionally an optional SAML attribute named “userRole“ can be configured in the IdP and added to the SAML response to specify the Role that should be set for the User. The value of the attribute, per Role, should be set to ensure the correct Role mapping.
- Extra User fields can also be configured using SAML attributes:
| SAML Attribute Name | User Field |
|---|---|
| firstName | First Name |
| lastName | Last Name |
Note that details for “Created” Users in the Portal cannot be edited as the values come from the SAML response, and are updated if changed on every successful login.
SAML Group Mapping
In an IdP, groups help simplify user management. If the user is configured in certain groups in the IdP, this can be exposed in SAML and used to determine the user's team/role combinations in Portal. This mapping should be configured ONCE (in the Portal) and not per user. Users team/role memberships are then automatically mapped on first and future logins.
To create teams in the Portal, please refer to the Teams page.
In most IdPs, groups are exposed through a SAML attribute (for example: groups, memberOf, or member). There may be a default SAML groups attribute in your IdP or you may have to configure one - either way we need to know the attribute name (see below).
Before configuring SAML Group Mapping in the Portal UI:
- Create groups in your IdP and assign users to them.
- In your IdP SAML application, configure a groups attribute:
- Attribute name:
groups(or your chosen group attribute name) - Name format:
Unspecified - Filter:
Matches regexwith value.*(if required by your IdP policy)
- Attribute name:
- In the SAML tab, select
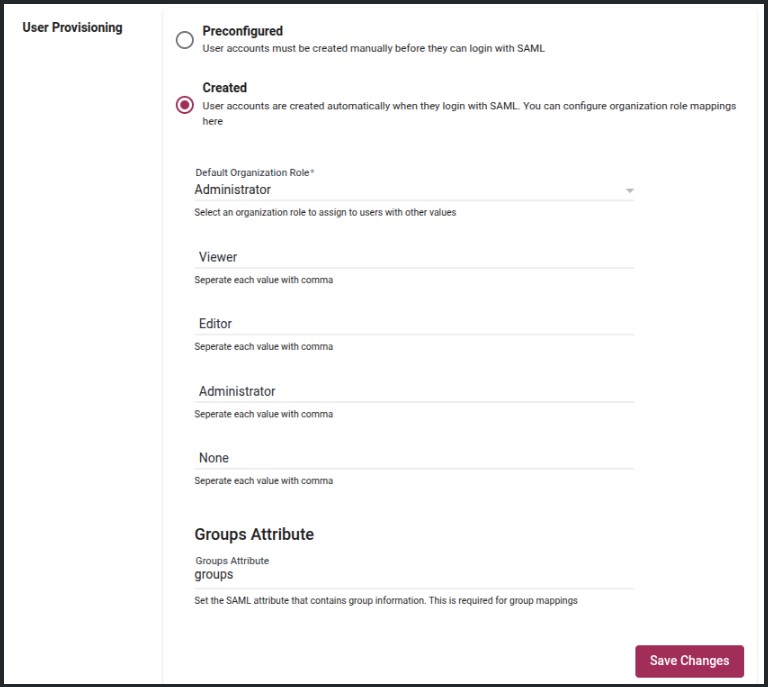
CreatedunderUser Provisioning. TheGroups Attributefield appears in the Portal UI.
- In
Groups Attribute, enter the IdP group attribute name configured in your SAML application.- Example: if your IdP sends groups in
groups, entergroups. - Click Save Changes and confirm.
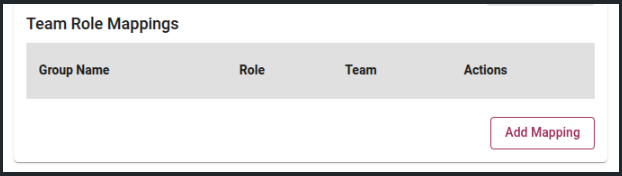
- After saving, the Add Mapping button is enabled in the team-role mappings table.
- Example: if your IdP sends groups in
Add Team Role Mapping
In Portal, we are mapping IdP groups to teams in the Portal using team role mappings.
For example, if you want to map the developers group in your IdP to the developers team in Portal, then you would do the following:
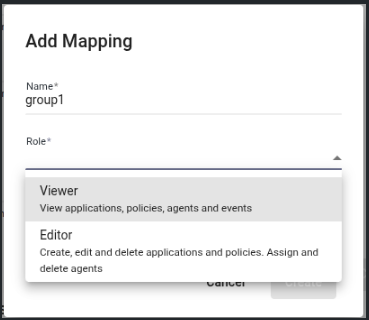
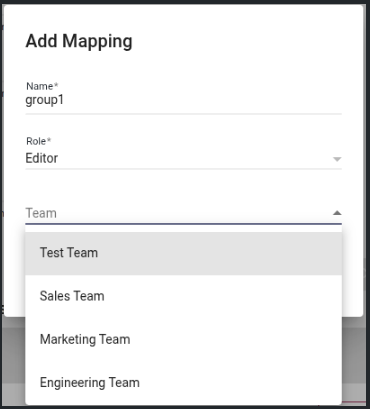
- Click Add Mapping button. You will get an Add Mapping dialog with 3 fields:
Group Name,TeamandRole. - In
Group Namefield, enter the IdP group name exactly as sent in the SAML assertion (exact, case-sensitive match), e.g.developers. - Click the Role drop-down.
- Select a role. Currently, only
EditorandViewerare supported.
- Click the Team drop-down.
- Select the team in the Portal to map to, for example
Engineering Team.
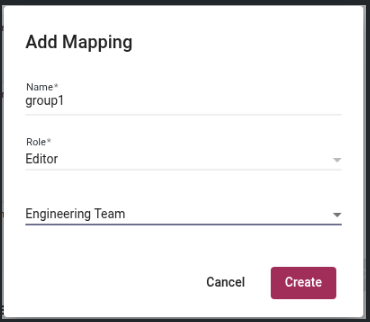
- Click Create.
- Once the mapping is created, you will see the new team role mapping in the table as follows:
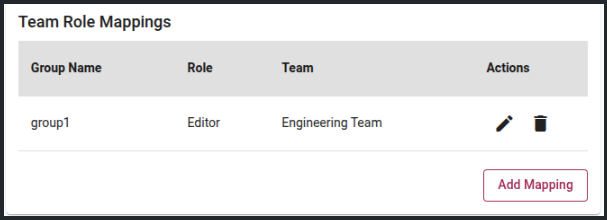
After the mapping is created, when the user who is a member of developers group in IdP logs in to Portal, they will automatically become a member of Engineering Team with Editor role in Portal.
Edit Team Role Mapping
The Edit Team Role Mapping action lets users update the role and team in an existing mapping. The group name cannot be changed after creation. To edit a mapping:
- Click the Edit Pencil Icon. You will get an Edit Mapping dialog as follows:
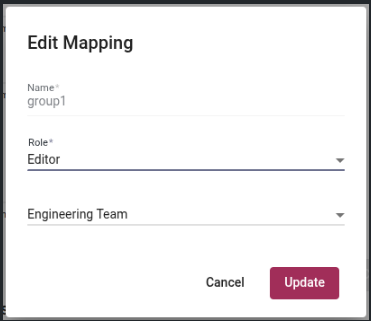
- In the Edit Mapping dialog, update Role and Team.
- The group name is read-only. To change it, delete the mapping and create a new one.
- Click Update.
Delete Team Role Mapping
The Delete Team Role Mapping action removes the mapping from the Portal. This change will take effect next time mapped users login through the IdP.
- Click the Delete Icon. You will get a confirmation dialog as follows:
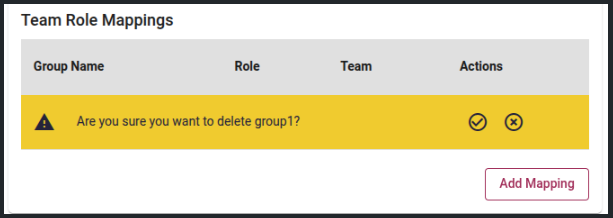
- Click Confirm to permanently delete the mapping.
- Click Cancel to keep the mapping unchanged.